Description of the Render Graph Blocks
Input blocks
Here is the description of the input blocks supported by the node render graph framework.
Note that most of the input blocks are “external” inputs, which means that you will have to provide a value for these blocks in your code, after loading a node render graph. The only input block that can be configured as an “internal” input is the Texture input, in which case you can define all the characteristics of the texture (size, format, type, etc.) directly on the input inside the graph.
The NRGE preview area will try to set sensible values for the external inputs (such as using the scene camera for Camera inputs, using the scene meshes for ObjectList inputs, etc), so that the preview can still be useful. But this is only true in the context of the preview area; you will still need to supply these values yourself when using a node render graph in your code.
Camera
This input block allows you to define a camera in the graph, which you can connect to blocks that need a camera as input. This input is always an “external” input, so you will need to supply a value for this block in code when using a node render graph in your projects.
ObjectList
This input block allows you to define a list of objects in the graph, which you can connect to blocks that need an input list of objects. This input is always an “external” input, so you will need to provide a value for this block in code when using a node render graph in your projects.
Note that for the moment, an object list can contain a list of meshes + a list of particle systems. From a programmatic point of view, it is defined as follows:
export class FrameGraphObjectList { /** * The meshes in the object list. */ meshes: Nullable<AbstractMesh[]>; /** * The particle systems in the object list. */ particleSystems: Nullable<IParticleSystem[]>;}This list may also contain a list of sprites in the future.
ShadowLight
This input block allows you to define a shadow light (that is, a light that can generate shadows - all types of lights in Babylon, except area and hemispherical lights) in the graph, which you can connect to blocks that need a shadow light as input. This input is always an “external” input, so you will need to provide a value for this block in code when you use a node render graph in your projects.
The shadow light inputs are mainly used by the ShadowGenerator block, which itself can be connected to an ObjectRenderer block to render objects with shadows (see the description of the ShadowGenerator block below).
TextureBackBuffer, TextureBackBufferDepthStencil
These two input blocks allow you to use the back buffer texture and the depth/stencil texture in your graph. The back buffer texture is the screen texture, the one that will be displayed to the user.
Note that the use of these textures is subject to certain restrictions:
- You must use them together: you cannot use a normal depth/stencil texture (i.e. without a back buffer) if you use the back buffer texture in an
ObjectRendererblock, and vice versa. - You cannot use the back buffer texture when a block is expecting a texture that it can read. This means that it is not possible to use the back buffer texture for post-processing blocks, among others.
Given these restrictions, back buffer textures can only be used for the simplest graphs, and you may not use them much. Note that the Output block is responsible for copying its input texture into the back buffer texture, if the input texture is not already the back buffer texture.
Texture, TextureDepthStencil
These two input blocks allow you to create a texture and a depth/stencil texture. These are the only resources that can be configured as “internal” or “external”:
- Internal textures are configured directly in the NRGE. You must provide all the data necessary for the creation of the texture (size, format, type, etc.).
- External textures are provided by external code, after loading/creating a graph (using
NodeRenderGraph.ParseFromSnippetAsync, for example).
Configure a texture as “external” if you want to import an existing texture into your frame graph (see Frame Graph in addition to the scene render loop).
For “internal” textures, you will need to provide all the parameters necessary for creating the texture:
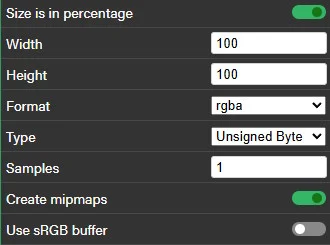
These parameters should be self-explanatory. Regarding Size is in percentage, if it is true, it means that the size values are percentages instead of pixel sizes. These percentages are related to the size of the output screen. If you set Width=Height=100, this means that the texture will be created with the same size as the output screen. If you set these values to 50, the texture will be created with half the size of the screen, and so on. Most of the time, you will want to check Size is in percentage to keep your frame graph independent of the output size.
Post-Process blocks
Example of post-process blocks:
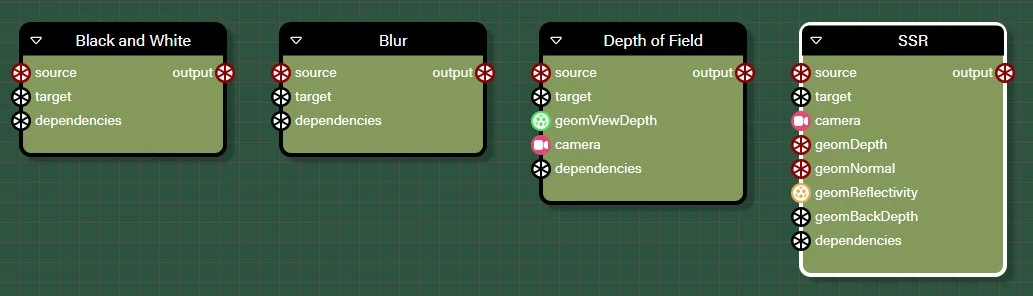
These blocks are all constructed according to the same model:
- They have a source and target input. The source is the texture to which the post-processing will be applied, and the target is the resulting texture. If target is not provided, a texture will be automatically created, with the same size, format, type, etc. as source.
- They have an output texture, which is the result of the post-processing applied to source, and which is the same texture as target.
You can modify the parameters of a post-process by clicking on it and changing the values in the panel on the right. For example, for the DepthOfField post-process:
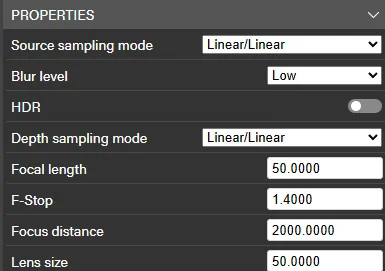
You should refer to the post-process class in the Babylon framework if you need an explanation of what each parameter does for a given post-process block (this page for depth of field, for example).
In the rest of this section, we will focus on post-processes that have special features and will skip post-processes that should be self-explanatory (those for which you just need to connect the right inputs and define the right values for their parameters!).
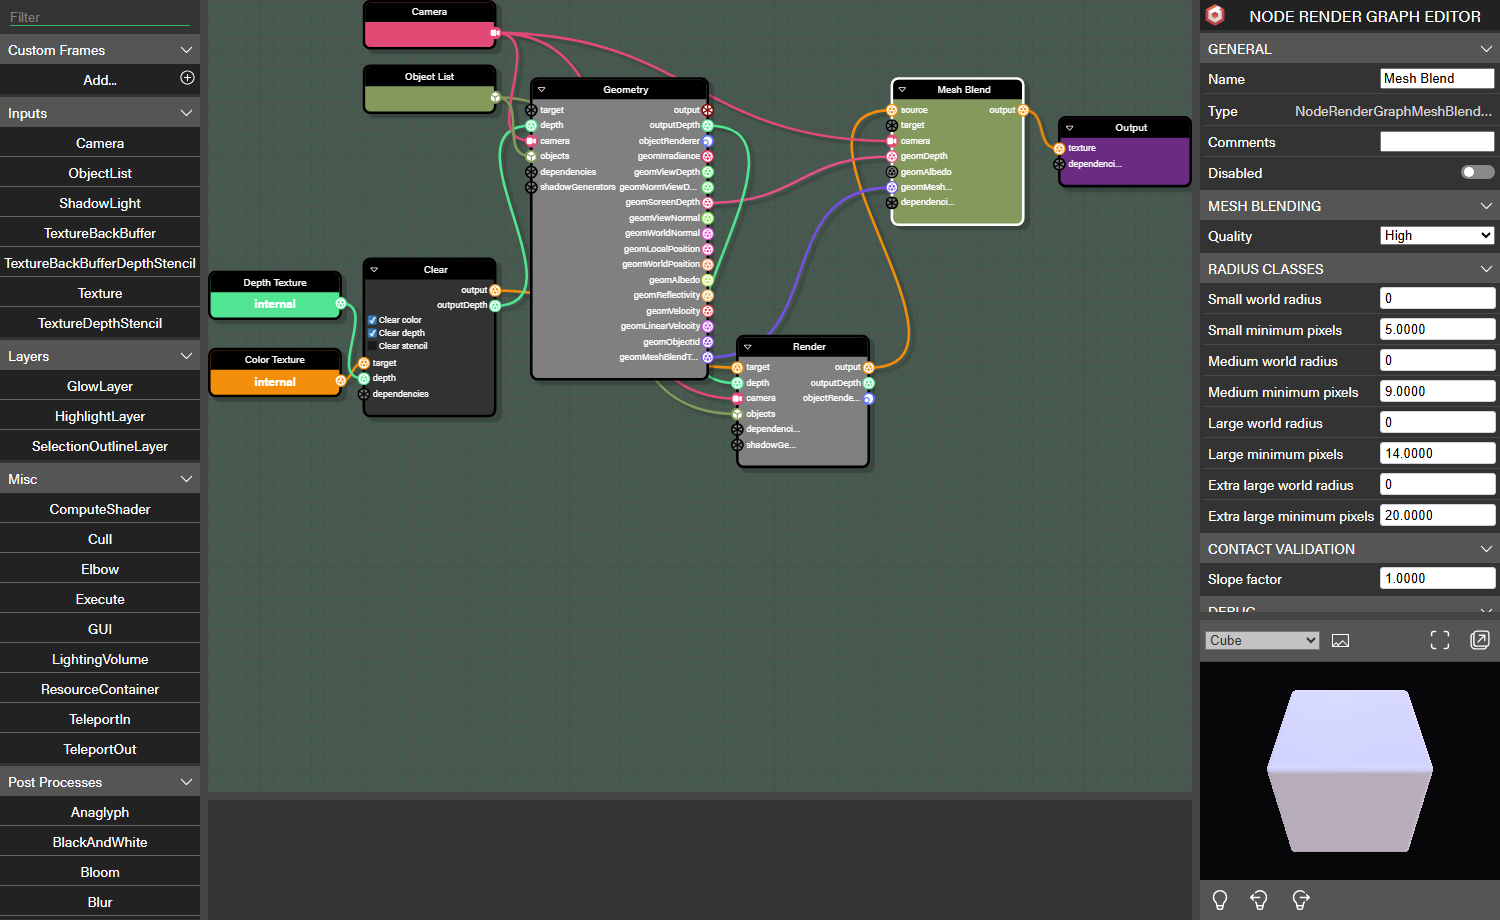
Mesh Blending
This block softens validated contacts between meshes by blending SceneColor in screen space.
In addition to the standard source, target, and output connections, it uses:
- camera. The camera used to project world radii and reconstruct positions.
- geomDepth. A view-depth or screen-depth texture.
- geomMeshBlendTag. The packed integer tag texture that identifies logical groups and radius classes.
- geomAlbedo (optional). Linear albedo used to attenuate shadow transfer. Leave it disconnected to compile all shadow-estimation work out.
Generate the geometry inputs with a GeometryRenderer block configured with one sample. Connect either geomViewDepth or geomScreenDepth to geomDepth; the block selects the matching depth representation during graph build.
The property panel exposes quality, all four radius definitions, slope factor, and debug mode. Refer to the mesh blending documentation for the complete settings reference, performance guidance, and transparency limitations.
Coastal cliff mesh blending in a node render graph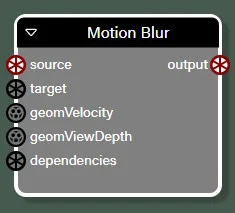
Motion Blur
This block allows you to apply a Motion Blur post-process to a given texture.
This block requires a geometry texture as input, which depends on the type of motion blur you want to use:
- for object-based motion blur, you need to connect a geometry velocity texture
- for screen-based motion blur, you need to connect a geometry view depth texture
If the appropriate texture is not connected according to the current motion blur type, you will get an error in the console log.
Both of these textures can be generated by the GeometryRenderer block (see below).
SSR (Screen Space Reflection)
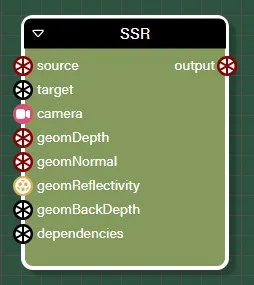
This block allows you to apply a Screen Space Reflection post-process to a given texture.
The first thing to note is that geomDepth and geomBackDepth allow a view or screen space depth geometry texture, and geomNormal allows a view or world space normal geometry texture: as explained in this section, you can see all the accepted connection types by clicking on the circle icon representing the connection point.
Furthermore, if you programmatically change the blur strength value (the FrameGraphSSRRenderingPipelineTask.ssr.blurDispersionStrength property) from 0 to a non-zero value, or vice versa, you must call the NodeRenderGraph.build() function again to rebuild the graph! This is because the frame graph task of the SSR rendering pipeline generates blur tasks when this parameter is non-zero, and does not generate them when it is zero (for performance reasons). This means that the rendering passes generated are not the same depending on this parameter, which is why you need to call build() again when you change it.
geomBackDepth is optional, and you should only connect a texture to this input if you check the Automatic thickness computation parameter of the SSR block. Do not connect a texture if you do not check this option, otherwise you will be penalized in terms of performance for having generated the texture when it is not used by the SSR block. If you connect something to geomBackDepth, you must connect the same type of texture as the one you connect to geomDepth: a view or a screen space depth texture. You will get an error message in the window message if you mix the types.
A typical configuration when using the Automatic thickness computation option is as follows:
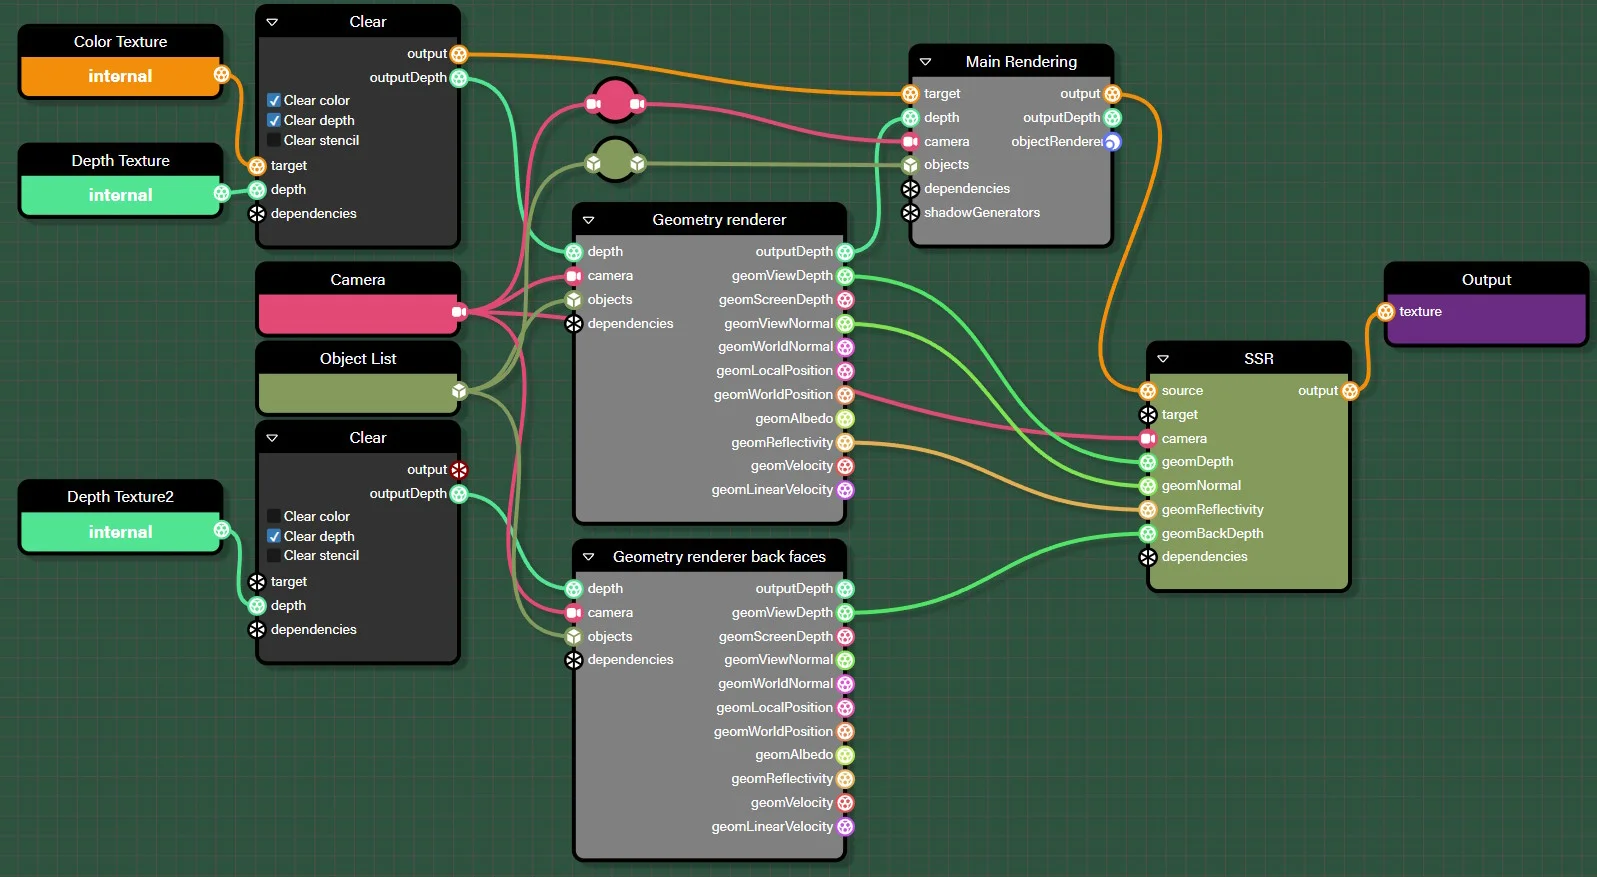
Note that the Geometry renderer back faces block has been configured with Reverse culling checked, because we need the depth of the back faces! You will get an error message in the window log if you forget to check this option for the GeometryRenderer connected to the geomBackDepth input (but only if Automatic calculation of thickness is checked!).
You will see in this PG that we are rebuilding the graph (see line 67) because we have set the ssr.blurDispersionStrength property to 0. As the SSR block has a non-zero value in NRGE, we are in the case explained above where the graph must be rebuilt.
TAA (Temporal Anti-Aliasing)
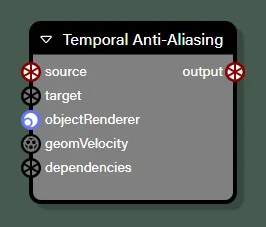
This block is slightly different from other post-process blocks, as the source input is mandatory and the target input is not (yet) used. In addition, this block must instrument the rendering of objects, which is why you must connect the objectRenderer output of an ObjectRenderer block to the objectRenderer input.
If you are using the reprojectHistory option, you must provide a geomVelocity texture. You can generate this texture using the GeometryRenderer block. Notes:
- you must connect the geomLinearVelocity output to the geomVelocity input (you will get an error if you connect the wrong output)!
- You should not connect anything to the geomVelocity input if you are not using the reprojection history option, otherwise you may get rendering artifacts (and affect performance).
Refer to Temporal Anti-Aliasing (TAA) Rendering Pipeline for more information on TAA and the parameters you can use to adjust the effect.
Rendering blocks
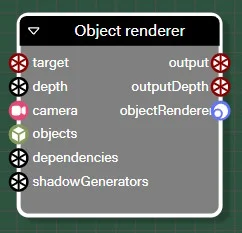
ObjectRenderer
This is the main block used to render objects on a texture. You can consider it as the equivalent of RenderTargetTexture when you want to create a render pass programmatically.
You will always get the same texture at the output output as the texture connected to the target input. The same goes for outputDeth and depth if you connect something to the depth input, which is optional.
Note that this block supports multi-target rendering, which means you can render to multiple textures at once. To enable this, simply connect the textures to a ResourceContainer block and connect the output of that block to the target input. For this mode to work, all textures must have the same dimensions and the same number of MSAA samples (if applicable). In this mode, output remains a single texture: it is the first texture connected to the ResourceContainer block.
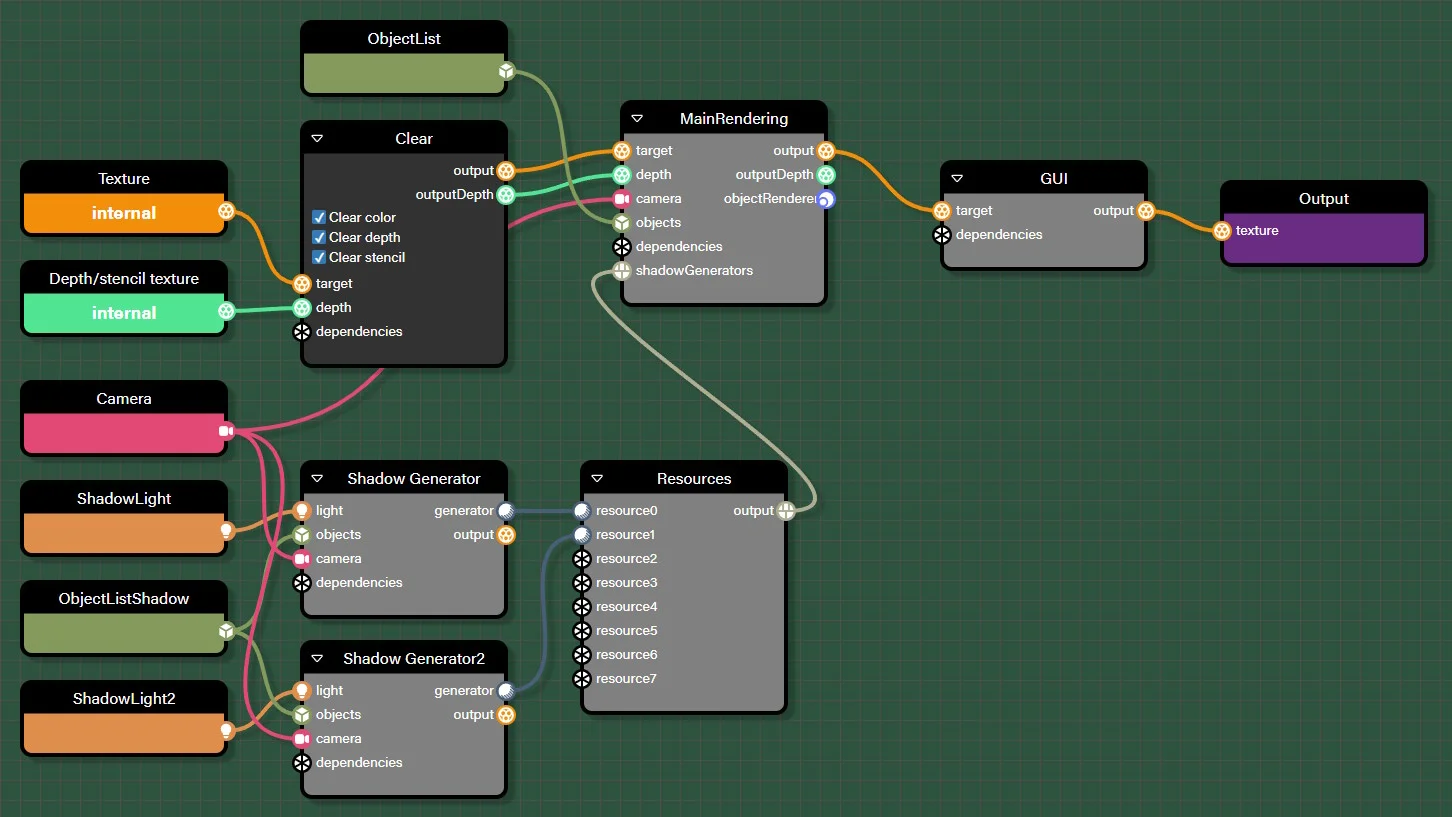
The shadowGenerators input is optional and can be used if you want to generate shadows at the same time as you render the objects. This input expects a connection from a ShadowGenerator.generator output. If you want to render objects with shadows from multiple lights, you can use a ResourceContainer block to gather multiple shadow generators, and connect the container to the shadowGenerators input:
Note that if you enable Order Independent Transparency (OIT - Use OIT for transparent meshes property in the property list of the block), the target/depth texture(s) must NOT use MSAA! So the number of samples must be 1 for these textures. If you want to get rid of anti-aliasing artifacts, you can use an FXAA or TAA post-process after the rendering pass.
Multiple shadow generators example (NRGE) Multiple shadow generators example (PG)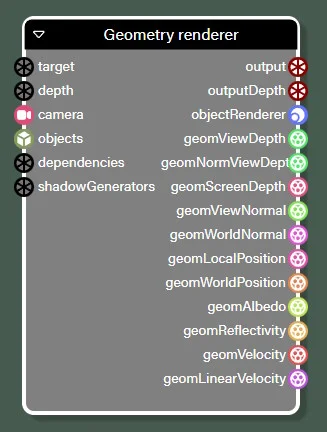
GeometryRenderer
This block is primarily used to generate geometry textures, i.e. textures containing special data such as depths in view/screen space, normals in view/world space, reflectivity, etc. Here is a list of all outputs that this block can generate:
- geomIrradiance: irradiance color, normally written by the material's geometry rendering shader.
- geomViewDepth: depth in camera view space. This is the Z component of the vertex coordinate in the camera's view space and is a value between near and far, the camera's near and far clipping planes.
- geomNormViewDepth: normalized depth in camera view space. Identical to the value above, but with values between 0 and 1, calculated using the formula
normViewDepth = (viewDepth - near) / (far - near). - geomScreenDepth: depth in screen space. This is the depth written to the depth buffer (
gl_FragCoord.z) and is a value between 0 and 1. - geomViewNormal: normal in camera view space. This is the normal to the vertex in camera view space. The vector is normalized before being written to the texture.
- geomWorldNormal: normal in world space. This is the normal at the vertex in world space. The vector is normalized before being written to the texture. It is also scaled and offset by 0.5 to generate components between 0 and 1.
- geomLocalPosition: position in local space. This is the position of the vertex in the object model space, i.e., before any camera or world transformations.
- geomWorldPosition: position in world space. This is the position of the vertex in world space.
- geomAlbedo: albedo color. This is the albedo/diffuse color of the vertex.
- geomReflectivity: reflectivity color. This is the reflectivity color of the vertex (used by SSR, for example).
- geomVelocity: velocity vector in screen space. See Motion blur by object for more details on what a velocity texture is. geomVelocity is a texture constructed with the optimization described in the “Format and precision” section to improve accuracy when using an unsigned byte texture type.
- geomLinearVelocity: linear velocity vector in screen space. It is identical to the one above, but without the optimization, so without the
pow()call. The coordinates are multiplied by 0.5, so that they are between [-0.5, 0.5] instead of [-1, 1]. - geomMeshBlendTag: packed
R8UImesh-blending group and radius-class tags. This output is used by theMesh Blendingblock.
You can reuse any supported geometry output channel whose built-in data your graph does not need for custom geometry data; geomIrradiance is just one example. Connect your chosen output to a consumer so the geometry renderer creates it, and optionally rename its displayed output in the NRGE editor for clarity. Renaming does not change the underlying channel or shader index. Your materials must overwrite that channel's default writes for every contributing object; a connection alone does not populate it with custom values. Check the channel's format, clear value, and other built-in writers before using the result; avoid the special object-ID and integer mesh-blend-tag channels. See Using an existing channel for custom geometry data for task setup, clear values, and shader guidance.
To make these textures stand out, the corresponding outputs are all preceded by the prefix geom. The same goes for the blocks that are expecting one (or more) of these geometry textures as input. For example:
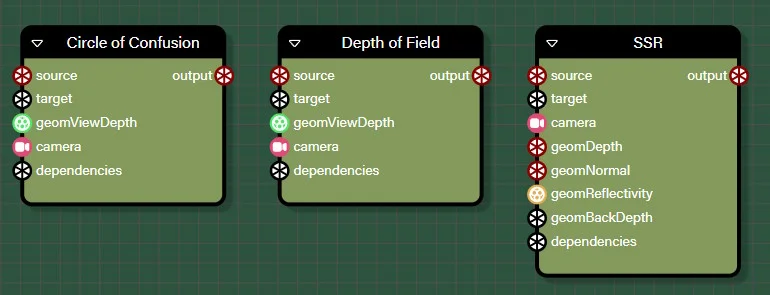
This makes it clear what kind of texture is expected for a given input and should help users to associate the right kind of texture with these blocks.
This block can also render a scene, similar to how ObjectRenderer does. There are some limitations when geometry textures and the normal texture scene (output property) are generated by the geometry renderer block:
- You must set disableDepthPrePass to false if any of your materials use needDepthPrePass, in order to avoid artifacts/errors with geometry textures, but this means you may get artifacts in the normal texture scene. Again, if you need this to work, use a separate object renderer block to generate the normal scene texture.
- You must use the same number of MSAA samples for all textures (target, depth, and NodeRenderGraphGeometryRendererBlock.samples). Using MSAA textures is more demanding in terms of performance. If you don't need MSAA for geometry textures, you can use the geometry renderer only for geometry textures and use an object renderer block to generate the normal texture scene.
Important: If you do not plan to use output, do not set anything in the target input property! If you connect something to target, the texture will be generated, even if it is not used via output.
ShadowGenerator and CascadedShadowGenerator
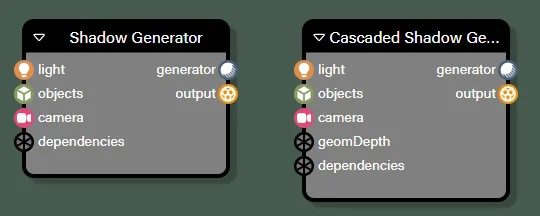
Use this block when you want to generate shadows from a light. The light must be a “shadow light”, i.e. any light except area lights and hemispherical lights.
The CascadedShadowGenerator block has additional parameters compared to the ShadowGenerator block (click on the block to access the list of parameters). It also has an additional (optional) input called geomDepth. You must connect a geometry depth (either “view,” “normalized view,” or “screen” - if possible, connect “normalized view,” or “screen” for best performance) to this input if you plan to use the autoCalcDepthBounds feature. If you do not, do not connect anything to the input to avoid generating a geometry texture when it is not needed.
You may be surprised to see a camera input, because the scene is rendered from the point of view of the light to generate the shadow map, not from the point of view of a camera. This camera is necessary to:
- split the camera frustum when using a
CascadedShadowGeneratorblock - calculate the LOD of the meshes. The LOD of the meshes is defined according to the distance from a camera, not from a light.
The generator output is what you need to connect to the ObjectRenderer.shadowGenerators input, to render meshes with shadows. This is because the ObjectRenderer block needs more than access to the shadow map texture; it needs access to the shadow generator object itself. The output is the texture of the shadow map, in case you need it in other parts of the graph.
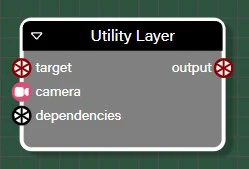
UtilityLayerRenderer
This block does not generate any outputs by itself, but it can be used to display Gizmos in a frame graph.
You will need to retrieve a reference to the utility layer by code, then use it as a parameter for the Gizmo classes.
For example:
Use of the UtilityLayerRenderer block (NRGE) Use of the UtilityLayerRenderer blockLayers blocks
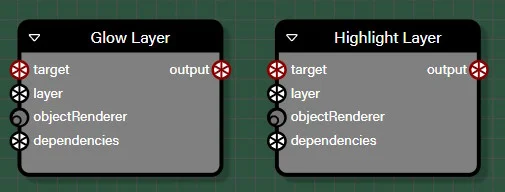
GlowLayer and HighlightLayer
These blocks allow you to use the Glow and Highlight effect layers in your frame graphs:
- The target input is the texture to which the glow or highlight effect will be applied.
- The optional layer input is a texture on which an intermediate (internal) rendering will be generated. This texture is then blended with the target to generate the output. If you do not provide layer, a texture will be created, based on the Layer texture ratio, Layer texture fixed size and Layer texture type parameters:
- If Layer texture fixed size is not 0, it is the size (width/height) of the layer texture in pixels. Otherwise, Layer texture ratio is a factor applied to the width/height of target to calculate the width/height of the layer texture.
- The Layer texture type parameter is the type of texture of the layer.
- The objectRenderer input must point to the
ObjectRenderer.objectRendereroutput used to generate the target texture: to function correctly, theGlowLayerandHighlightLayerblocks must have access to theObjectRendererobject itself and not only to the output texture.
Here is an example of how to use the GlowLayer block:
Note that this graph renders two glow layers in two different textures, with different parameters, which you cannot do without a frame graph!
Textures blocks
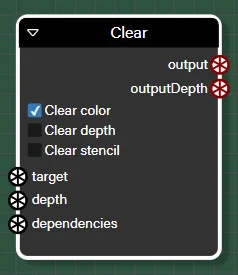
Clear
This block allows you to clear a color and/or a depth/stencil texture. The inputs target and depth are optional, but you must provide at least one of them (otherwise there is no reason to use a Clear block!).
The output output is identical to target, and outputDepth is identical to depth. As for the ObjectRenderer block, it supports multi-target rendering (clearing): use a ResourceContainer block to gather several textures and erase them all at once.
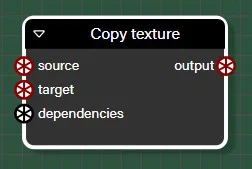
CopyTexture
The inputs and outputs of this block should be self-explanatory: source is the source texture to be copied and target is the texture to copy into. The output is the same texture as the target.
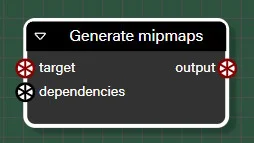
GenerateMipmaps
In a frame graph, mipmaps are not generated automatically; you must use a GenerateMipmaps block to do so.
Once again, the inputs and outputs are self-explanatory: target is the texture for which the mipmaps are to be generated, and output is the same as target.
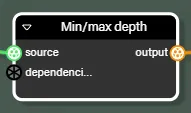
MinMaxReducer
The MinMaxReducer block in the Textures palette reduces the red channel of a color source, or the depth aspect of a WebGPU depth/stencil attachment, to its minimum and maximum values. Connect a general-purpose color texture, the geomViewDepth, geomNormViewDepth, or geomScreenDepth depth-as-color output of a GeometryRenderer block, or a TextureDepthStencilAttachment source on WebGPU. For depth-as-color outputs, enable Depth-as-color reduction (depthRedux) and select the matching Depth-as-color type (depthTextureType: view, normalized view, or screen depth); the normalized view-depth type is the default. For an attachment, the block automatically uses screen depth and ignores the depth clear value (1 for forward depth, 0 for reverse depth); stencil is not reduced.
Depth/stencil sources must be single-sampled off-screen 2D attachments on WebGPU. Backbuffer depth/stencil, stencil-only or unsupported depth formats, multisampled attachments, and 2D-array, cube, or 3D textures are not supported. WebGL does not support depth/stencil sources for this block.
The output is a 1x1 RG color texture (minimum in red, maximum in green), which can be connected to a downstream texture input. If the result is needed only through the block's task.onAfterReductionPerformed observable, connect output to a downstream block's dependencies input to include the reducer in the graph; otherwise it may not execute. The reducer's own dependencies input is optional. The block has no scalar min/max output ports. CPU readback takes place only when an observer subscribes to the task's observable; without observers, the result stays on the GPU.
The property panel exposes Depth-as-color reduction, Depth-as-color type, Texture type (half float by default; also supports float and unsigned byte), and Wait for readback (waitForReadback); these settings are serialized with the graph. For attachment sources, depth reduction and screen depth are inferred regardless of the depth-as-color settings. With depth reduction enabled, observers receive [0, 1] for equal-valued depth. Wait for readback defaults to false. On WebGPU, enabling it notifies observers asynchronously after GPU readback completes, without blocking frame execution; a notification is not synchronous with the current frame. With the default setting, WebGPU observers may receive previous values. WebGL readback remains synchronous. See FrameGraphMinMaxReducerTask for the equivalent frame graph task and an example using geometry depth.
Misc blocks
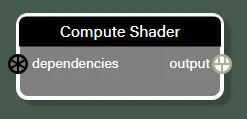
ComputeShader
This block allows you to execute a compute shader (WebGPU only - doesn't do anything in WebGL). The compute shader must be configured programmatically. See the NRG playground in FrameGraphComputeShaderTask for an example of how to use this block.
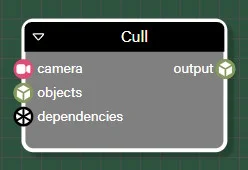
Cull
This block allows you to cull a list of objects against a camera frustum: you must provide the camera via the camera input, and the list of objects via the objects input. The result of this block is provided by the output: the list of objects that are (at least partially) inside the camera frustum.
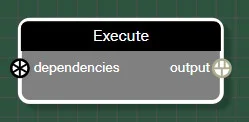
Execute
This block allows you to add a custom processing during the execution of a frame graph.
Once you have added an Execute block in the graph flow, you must retrieve a reference to this block in code and provide the function to be executed when the block is executed:
const executeBlock = nrg.getBlockByName("<name of the Execute block>");executeBlock.task.func = (_context) => { // Code to execute when the task is executed};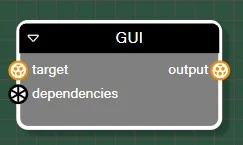
GUI
This block allows you to apply a full-screen GUI over a frame graph texture.
Once you have added a GUI block to the graph flow, you must retrieve a reference to this block in code and add elements to the GUI, just as you would when creating an AdvancedDynamicTexture yourself. For example:
import { Button } from "@babylonjs/gui/2D/controls/button";const guiBlock = nrg.getBlockByName("<name of the GUI block>");const gui = guiBlock.gui;const button = Button.CreateSimpleButton("button", "Edit Frame Graph");button.onPointerClickObservable.add(() => { nrg.edit({ nodeRenderGraphEditorConfig: { hostScene: scene, } });});gui.addControl(button);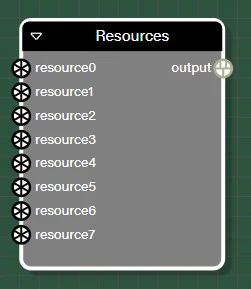
ResourceContainer
This block allows you to gather several resources of any type in a single block. It can be useful when you need to pass several resources to a block that has only one input for that resource.
We saw an example earlier, when we wanted to render objects with multiple lights generating shadows. We connected the two shadow generators to a ResourceContainer block and linked the container to the ObjectRenderer.shadowGenerators input:
Output
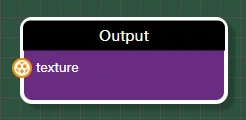
This is the block you must connect to in order to generate something on the screen.
Note that when you use a frame graph to generate a texture that you want to reuse elsewhere (in another frame graph, or anywhere else for that matter) and not render on the screen, you can deactivate the block to avoid a copy to the screen:
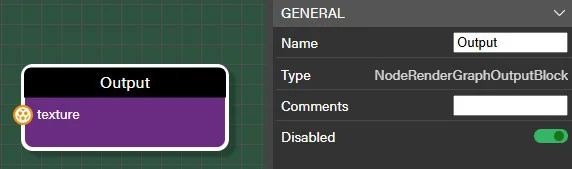
Even in this case, you must connect something to the Output block, otherwise your graph will not be valid!