Node Particle Editor
Starting from Babylon.js v8.14, you can design complex and intricate particle systems using the Node Particle Editor (NPE).
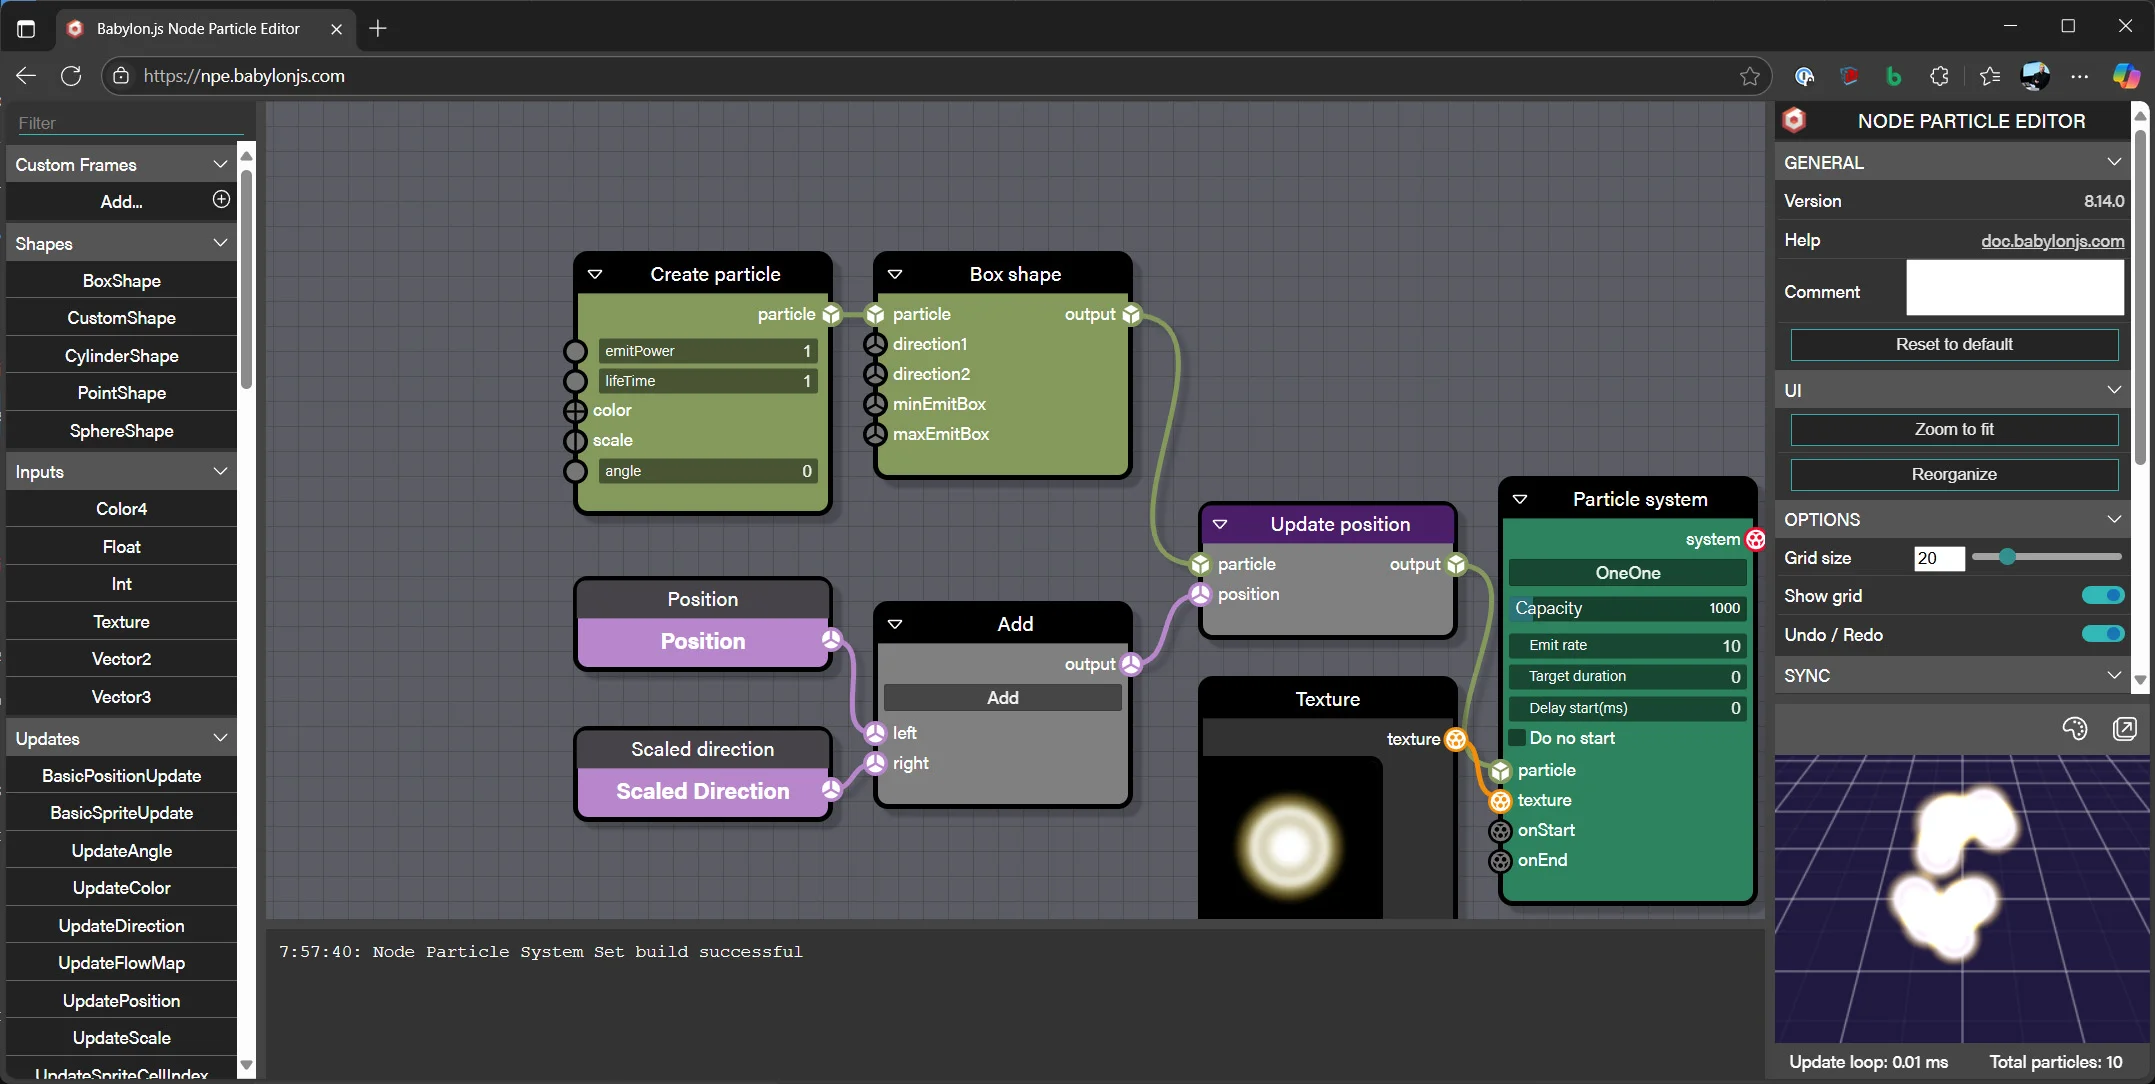
NPE
NPE lets you define one or more particle systems. It creates a ParticleSystemSet that can be used directly.
import { NodeParticleSystemSet } from "@babylonjs/core/Particles/Node/nodeParticleSystemSet";const npe = await NodeParticleSystemSet.ParseFromSnippetAsync("#8O4BJ2");const particleSystemSet = await npe.buildAsync(scene);particleSystemSet.start();Here’s a complete example you can try out:
NPEHow To Use NPE
To use NPE, head to npe.babylonjs.com.
The default graph for a node particle system contains the minimum required components for the graph to function. These are the core components that every graph has, with varying levels of complexity depending on the needs of the particle system.
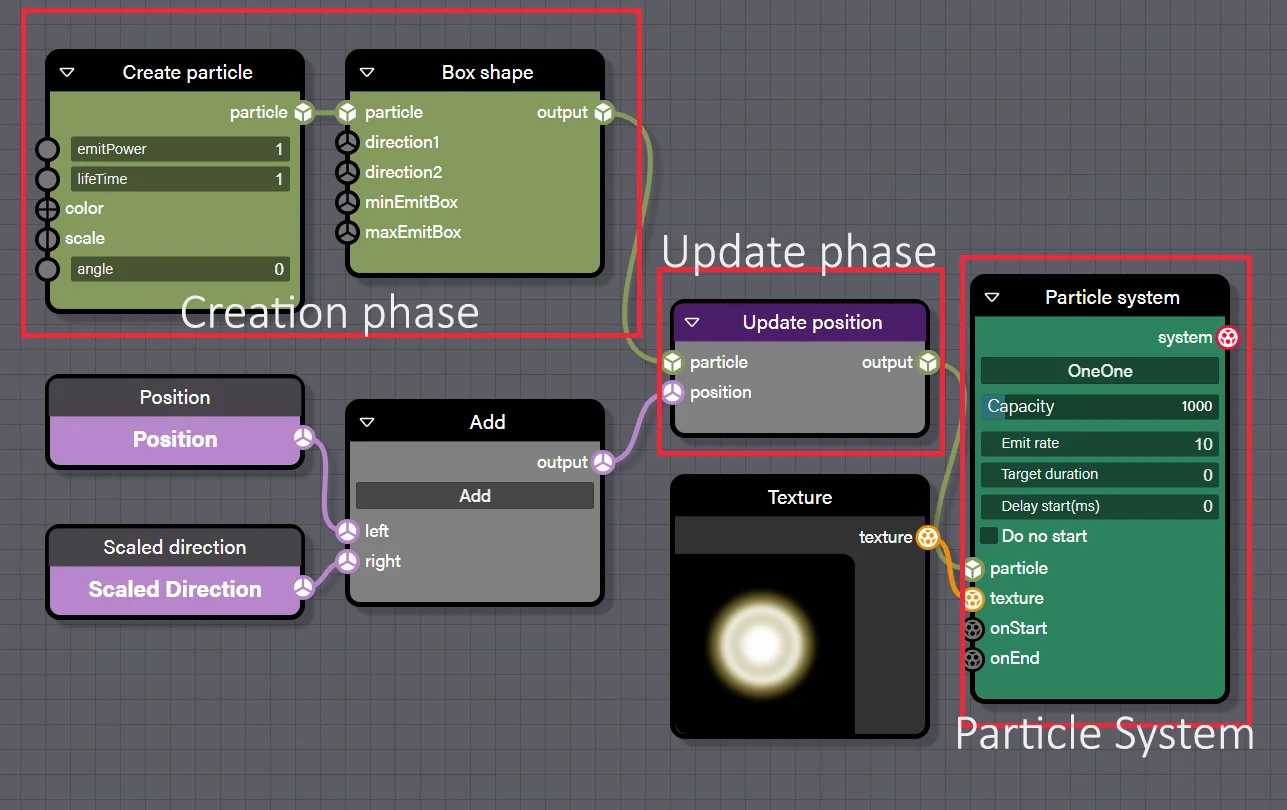
To set up a particle system, you’ll need three core components:
- The creation logic, using at least a Create Particle block and an Emitter Shape block
- The update logic
- The particle system itself, defined by a System block
Note: For now, NPE only generates CPU-based particle systems.
Creation Phase
When a particle is created, its parameters are taken from this section of the graph. Depending on how the graph is wired, each particle can draw from the same parameters, or you can use a combination of nodes to evaluate parameters per particle or per system.
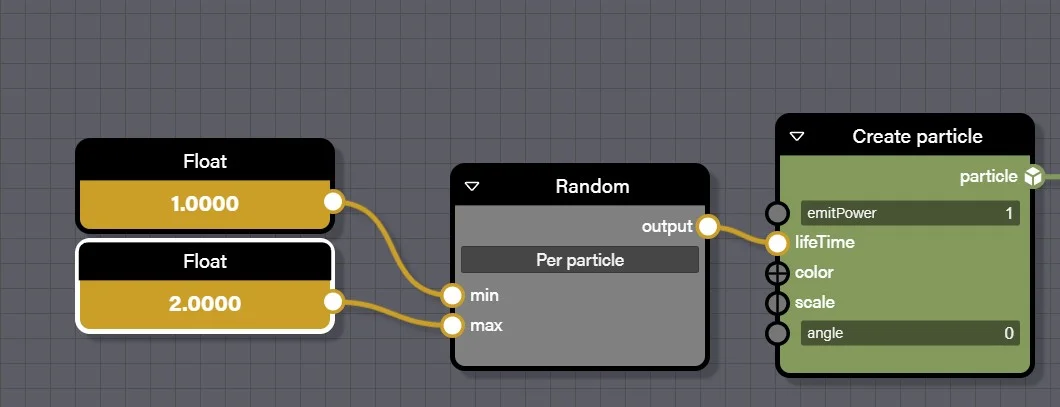
In this example, each new particle is given a randomly chosen lifetime between 1 and 2.
The shape blocks are how you define shape emitters, which describe the volume used to determine the emission position and direction of each particle.
Update Phase
The update logic is executed every frame for each particle. In this example, we update the position by adding the velocity (also known as the scaled direction, i.e., the direction adjusted for frame rate).
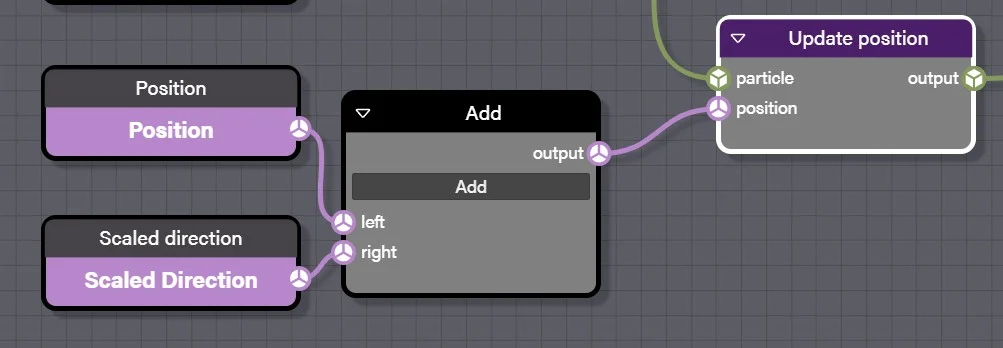
To control particle properties such as color, scale, or position, choose the appropriate update block to add to your graph. The manipulation of the values passed to these blocks and even the order in which the update blocks are wired can have a big impact on the look of your particle system.
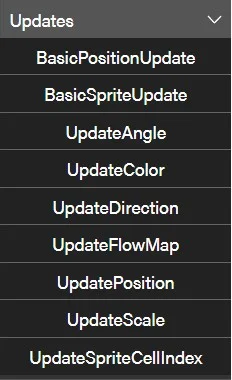
There are several inputs known as contextual values, such as Position or Scaled Direction. These represent values for each particle at a specific point in its lifetime. For example, on each frame, the Position contextual value changes based on a combination of emission power, gravity, drag, attractors, flow maps, and more. On any given rendered frame of the scene, you may need the particle's position to change its color or its life to change its alpha value. That is when you would use contextual value input blocks.
For basic behaviors, we offer direct function blocks so you don't need to manually wire everything. For example, the earlier logic can be replaced with BasicPositionUpdate:
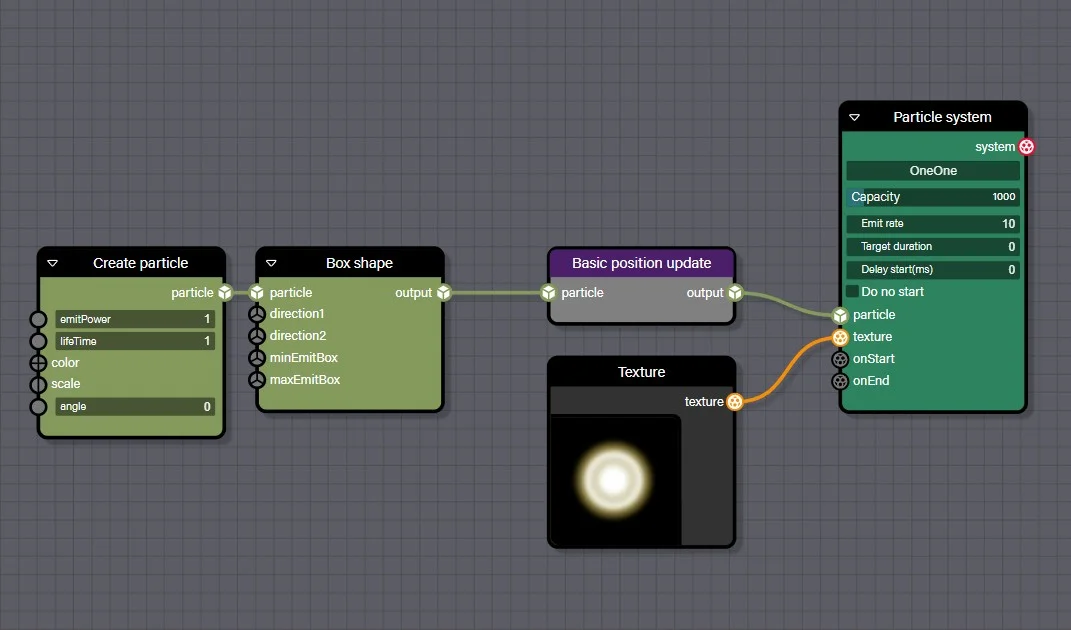
The System Block
This block defines the core properties of the system (like capacity) and accepts inputs such as emitRate and texture. You must provide, at a minimum, a particle input and a texture input.
Managing Random Values
A core feature of any particle system is randomness. To support this, we provide three types of randomization blocks:
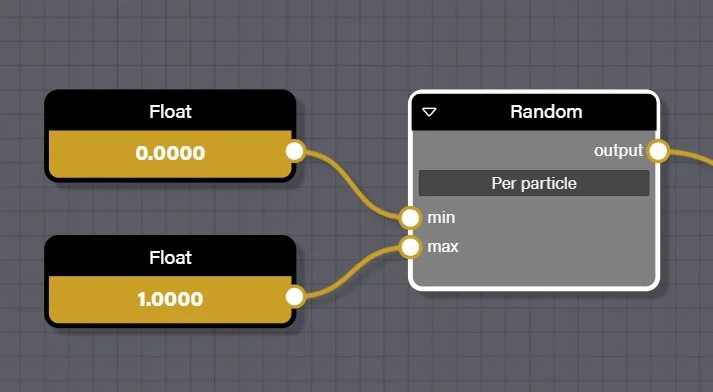
Random
The basic block for generating random values. It can generate values per particle, per system, or on every call.
Gradient
Use this to create value ramps. Based on an input from 0 to 1, the output is determined by the reference values of all attached gradient blocks. The gradient block with the largest reference value that is still less than the input value supplies the output.
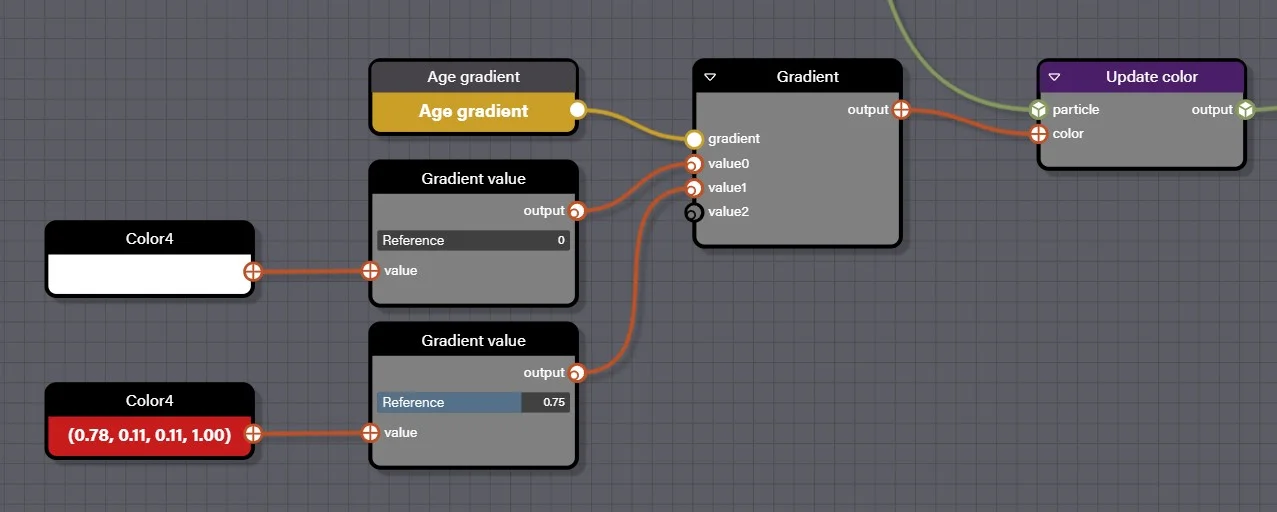
In this case, we use the AgeGradient contextual value (representing particle life from 0 to 1) to determine color. The particle is born white and fades to red, reaching full red at 75% of its lifetime.
Triggers
To add more complex behaviors, you can use triggers to link multiple particle systems — for example, to start a new one when a specific condition is met.
Here is a pretty complex example. More precisely, in the top-right corner:
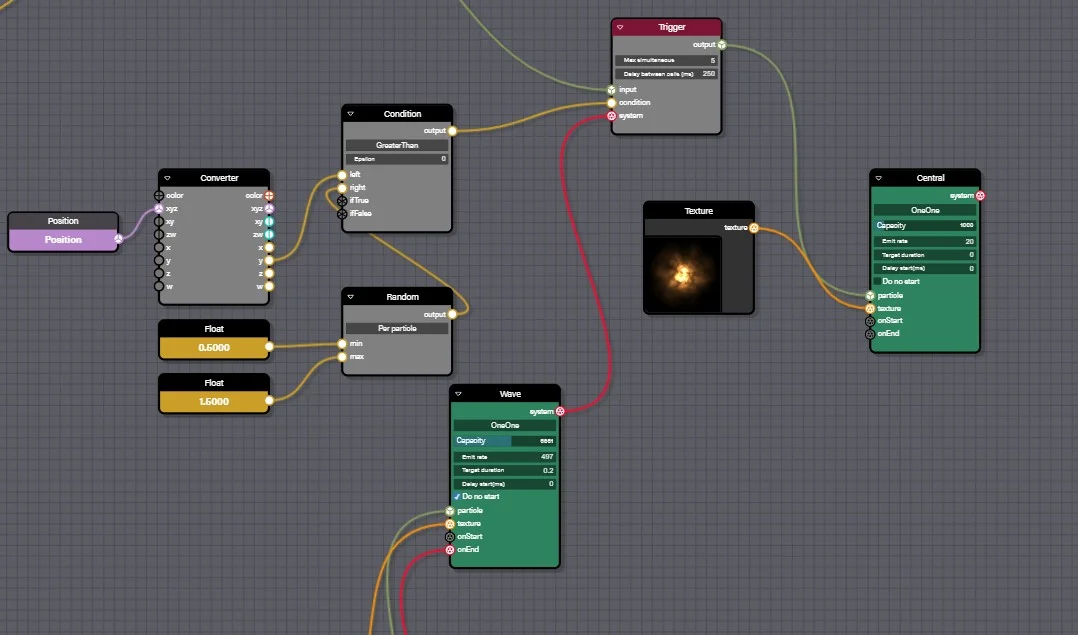
Here, we've introduced a Trigger block. This block must be connected to another particle system — it's designed to start a clone of that system when a specific condition is met. You can also limit the maximum number of simultaneous systems to avoid overloading the CPU.
In our example, if a particle from the source system has a position.y greater than a random value between 0.5 and 1.5, it triggers a clone of the target system. However, this trigger will only fire once every 250 ms, and no more than 5 instances can be active at the same time.
Another option is to use the onStart and onEnd events on each particle system:
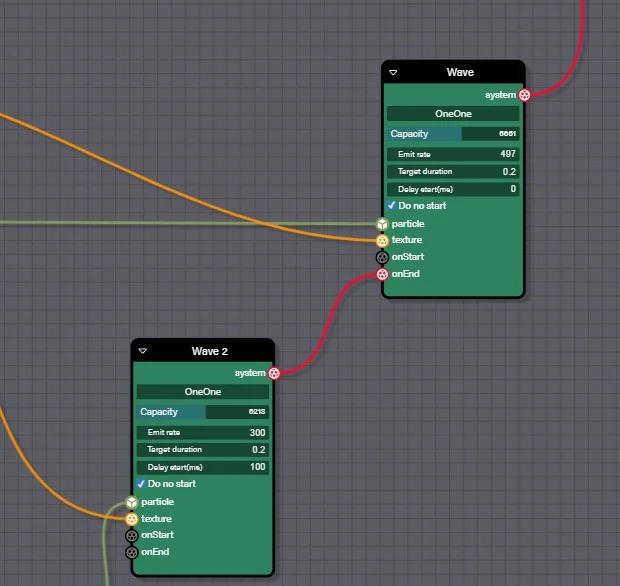
In this example, the "Wave2" particle system will start when the "Wave" system ends. For this to work, "Wave" must have a target duration — otherwise, it would loop endlessly and never emit an onEnd event.
Also note: "Wave2" is set to not start automatically.
Learn More
For a complete reference of all available blocks and their inputs, outputs, and properties, see the Node Particle Editor Blocks page. For details on the editor interface, shortcuts, and organization features, see the Node Particle Editor tool page.