Introduction To Materials
Materials allow you to cover your meshes in color and texture. How a material appears depends on the light or lights used in the scene and how it is set to react.
Reactions to light
There are four possible ways that a material can react to light.
- Diffuse - the basic color or texture of the material as viewed under a light;
- Specular - the highlight given to the material by a light;
- Emissive - the color or texture of the material as if self lit;
- Ambient - the color or texture of the material lit by the environmental background lighting.
Diffuse and Specular materials require a light source to be created.
Ambient color requires the ambient color of the scene to be set, giving the environmental background lighting.
import { Color3 } from "@babylonjs/core/Maths/math.color";scene.ambientColor = new Color3(1, 1, 1);Color
Create a material using
import { StandardMaterial } from "@babylonjs/core/Materials/standardMaterial";const myMaterial = new StandardMaterial("myMaterial", scene);Set the material color using one, some, or all of diffuseColor, specularColor, emissiveColor, and ambientColor. Remember that ambientColor will only apply if the scene ambient color has been set.
import { StandardMaterial } from "@babylonjs/core/Materials/standardMaterial";import { Color3 } from "@babylonjs/core/Maths/math.color";const myMaterial = new StandardMaterial("myMaterial", scene);myMaterial.diffuseColor = new Color3(1, 0, 1);myMaterial.specularColor = new Color3(0.5, 0.6, 0.87);myMaterial.emissiveColor = new Color3(1, 1, 1);myMaterial.ambientColor = new Color3(0.23, 0.98, 0.53);mesh.material = myMaterial;Diffuse Color Example
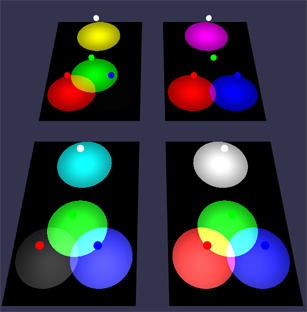
To give an idea of how the material's diffuse color reacts to the diffuse light color, the following Playground example shows how different material colors react to white, red, green, and blue diffuse spot lights.
Material Color Reaction to Light ColorThe following materials also show this reaction to white, red, green, and blue diffuse spot lights:
- Yellow Material
- Purple Material
- Cyan Material
- White Material
Ambient Color Example
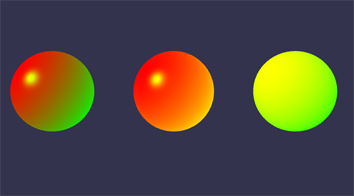
In the image below, all spheres are lit by the same hemispheric light, with diffuse red and groundColor green. The first sphere has no ambient color, the middle has red ambient color defined on its material, and the one on the right has a material with green ambient color. The scene ambient color, which must be present, is white.
When a scene ambient color component is set to 0, for example red, then whatever the value for red in the material ambient color, it will have no effect.
Transparent Color Example
Transparency is achieved by setting a material's alpha property from 0 (invisible) to 1 (opaque).
myMaterial.alpha = 0.5;Texture
Textures are formed using a saved image.
Create a material using
import { StandardMaterial } from "@babylonjs/core/Materials/standardMaterial";const myMaterial = new StandardMaterial("myMaterial", scene);Set the material texture using one, some, or all of diffuseTexture, specularTexture, emissiveTexture, and ambientTexture. Notice that ambientTexture is applied without the scene ambient color having been set.
import { StandardMaterial } from "@babylonjs/core/Materials/standardMaterial";import { Texture } from "@babylonjs/core/Materials/Textures/texture";const myMaterial = new StandardMaterial("myMaterial", scene);myMaterial.diffuseTexture = new Texture("PATH TO IMAGE", scene);myMaterial.specularTexture = new Texture("PATH TO IMAGE", scene);myMaterial.emissiveTexture = new Texture("PATH TO IMAGE", scene);myMaterial.ambientTexture = new Texture("PATH TO IMAGE", scene);mesh.material = myMaterial;Note: When no normals are specified, Babylon's standard material will compute the normals.
Texture Example
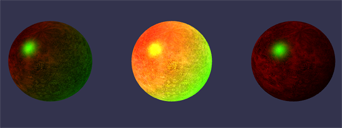
In this image, all spheres are lit by the same hemispheric light, with diffuse red and groundColor green. The first sphere has a diffuse texture, the middle has an emissive texture, and the one on the right has a material with red diffuse color and an ambient texture.
Transparent Texture Examples
For colors, transparency is achieved by setting a material's alpha property from 0 (invisible) to 1 (opaque).
myMaterial.alpha = 0.5;In addition, the image used for the texture might already have a transparency setting, such as this picture of a dog from Wikimedia Commons, which has a transparent background:
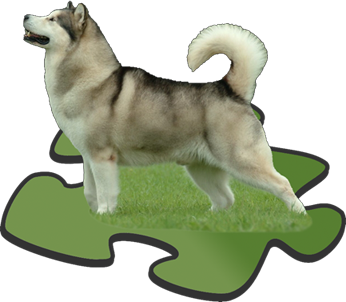
In this case we set the hasAlpha property of the texture to true.
myMaterial.diffuseTexture.hasAlpha = true;For the back faces of the cube to be visible through the transparent areas of the front faces we have to deal with back-face culling.
Texture Packer
Some complex scenes will require a large amount of textures for just one material. In this case it can be convenient to package the textures. The advantage of using the texture packer has to be weighed against limitations such as fixed size scaling.
More on creating a texture package
Back-Face Culling
This is a method for efficiently drawing the 2D rendering of the 3D model. Usually there is no need to draw the back face of a cube or other object, as it will be hidden by the front face. In Babylon.js the default setting is, as you might expect, set to true. In most cases, this is helpful in maintaining the highest possible performance.
Looking at the images below, when the material property backFaceCulling is true you can see that the transparent areas around the dog are still transparent, you can see the background through them. However, you cannot see the images on the back faces as they have been culled (or removed). When backFaceCulling is false the back faces are not removed during rendering, so they can be seen through the transparent areas of the front faces.
| Back Face Culling True | Back Face Culling False |
|---|---|
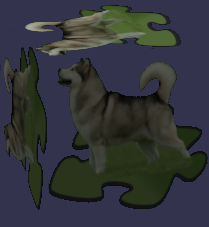 | 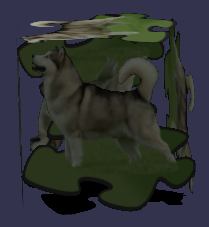 |
Note that backface culling is one aspect of face culling: you can also perform frontface culling if you wish! Backface culling is much more commonly used than frontface culling, but in some cases you may want to enable frontface culling. To do so, set the material property cullBackFaces to false. Note that you must always set backFaceCulling to true to enable culling! backFaceCulling is misnamed for historical reasons, and in order to maintain backward compatibility, we cannot rename it to faceCulling.
WireFrame
Every material can be displayed as a wireframe by setting the wireframe accessor of the material to true.
materialSphere1.wireframe = true;The output of enabling wireframe mode on the material is to display the wireframe using a line renderer, while still displaying the specific properties defined by the material including color, specularity, and alpha. Note that wireframe mode ignores the value for backFaceCulling on the material because there is no backface any longer. Instead, lines are rendered on mesh edges and the concept of "back face" is no longer applicable.
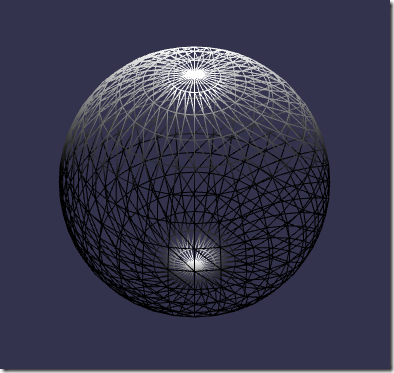
This will work with any material available in Babylon.js such as StandardMaterial, PBRMaterial, and even NodeMaterial. This is because the accessor is inherited from the Material class, enabling every material in the engine to take advantage of it. Controlling the appearance of the wireframe is done through the material's parameters.
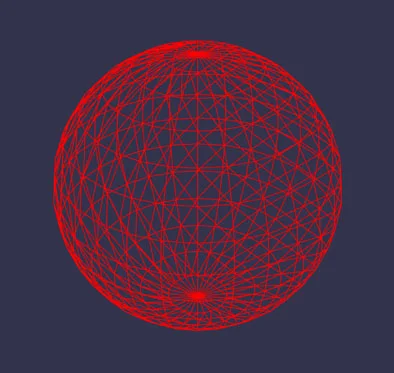
However, the thickness of the line is predetermined by the line renderer in screen space which renders the line at the same thickness regardless of the distance from the line to the camera. This means that the wireframe will dynamically update the thickness so that it won't cease to render if the camera gets too far away.
Rendering WireFrame Over Material
If it is necessary to render a wireframe over an existing material, the way to achieve this is by cloning the mesh and assigning a material to it that has wireframe enabled. Since the wireframe renders in screen space, depth sorting is not an issue and the wireframe will always render on top of the visible parts of the mesh. The wireframe can be occluded by other meshes in the scene, but will not be occluded by an identical mesh that shares the same world position as the wireframe mesh.
This enables scenarios where blending materials and wireframes is necessary. In the example below, two NodeMaterials are used to create the layer effect blending between wireframe over a solid color to the material's base color. The gradient for the interpolation is based on the distance from a pixel to the world origin and the same value is passed to both the NodeMaterial for the mesh and the NodeMaterial for the wireframe. In the case of the wireframe, this gradient is setting the alpha value of the material rather than interpolating between two different colors, which makes the wireframe appear to blend into the original material base color. This is the power of leveraging NodeMaterial to drive the look of the wireframe of a mesh.
Local File Access
An important thing to remember is that, for security reasons, web browsers don't allow local files to be accessed from web pages. This includes any texture files you are using. You can use a local server or an image hosting service that is CORS enabled.