Using the Default Rendering Pipeline
Introduction
You can find a complete example of this pipeline in our playground:
Default Rendering Pipeline Example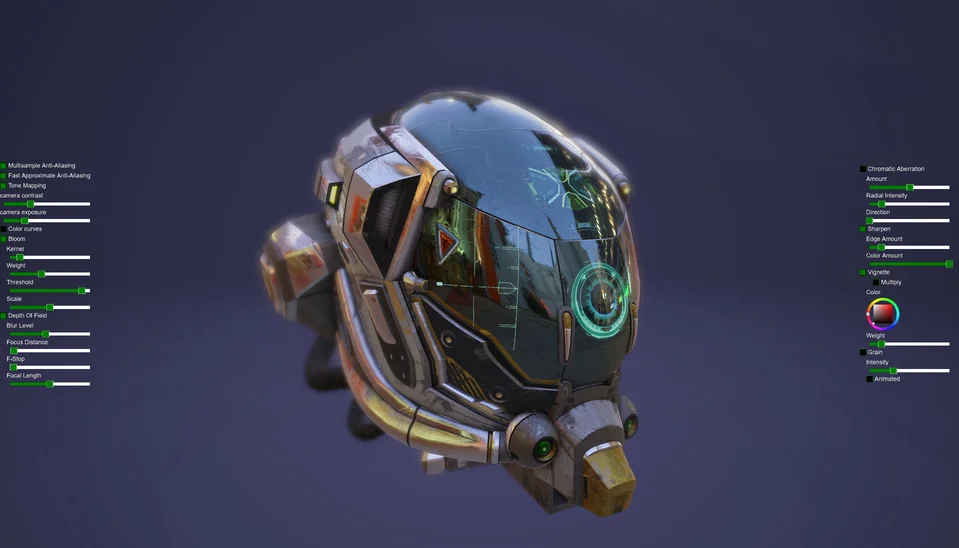
The default rendering pipeline provides visual improvements to enhance the output of your scene:
- Antialiasing (MSAA and FXAA)
- Bloom
- Chromatic Aberration
- Depth of field
- Image processing including:
- Color curves
- Color grading
- Contrast
- Exposure
- Tone mapping
- Vignette effect
- Glow
- Grain
- Sharpening
Creating the rendering pipeline
You just have to create an instance of BABYLON.DefaultRenderingPipeline:
import { DefaultRenderingPipeline } from "@babylonjs/core/PostProcesses/RenderPipeline/Pipelines/defaultRenderingPipeline";var pipeline = new DefaultRenderingPipeline("defaultPipeline", // The name of the pipelinetrue, // Do you want the pipeline to use HDR texture?scene, // The scene instance[camera] // The list of cameras to be attached to);This will actually create a fullscreen post-process texture.
Notes:
-
The HDR value should be
truewhenever possible, unless you're targeting a cheap fallback for low-end devices. This value allows either a half-float or float texture type, depending on the GPU. Also, some effects (like bloom) will be more accurate. -
When enabling a pipeline, you may notice that your scene clearColor will not match the color you have set. This can be fixed using
.toLinearSpace(), as in this Clear Color Fix
Customizing
Antialiasing
The MSAA antialiasing effect (supported only in WebGL 2.0 browsers) is off by default (set to 1) but can be increased using:
pipeline.samples = 4;Your value will be clamped by the maximum values allowed by the hardware (queried from the WebGL context).
The FXAA antialiasing effect can be set using:
pipeline.fxaaEnabled = true;Note: without using the pipeline, your scene already uses MSAA antialiasing, which is native to WebGL. As mentioned above, the pipeline runs on a post-process texture: unfortunately, WebGL 1.0 devices will not be able to apply MSAA outside of render buffers. Still, FXAA is available, though it is not as powerful as MSAA.
Sharpening
Sharpening can be enabled with:
pipeline.sharpenEnabled = true;To increase the intensity of the effect modify:
pipeline.sharpen.edgeAmount = 0.9;The amount of the original image in the output can be set with (setting this to 0 will produce edge detection output):
pipeline.sharpen.colorAmount = 0.0;Depth of field
You can turn the depth of field effect on and off with:
pipeline.depthOfFieldEnabled = true;Set the strength of blur with (higher may affect performance):
import { DepthOfFieldEffectBlurLevel } from "@babylonjs/core/PostProcesses/depthOfFieldEffect";pipeline.depthOfFieldBlurLevel = DepthOfFieldEffectBlurLevel.Low;Furthermore, you can control the settings of the effect with the following parameters:
pipeline.depthOfField.focusDistance = 2000; // distance of the current focus point from the camera in millimeters considering 1 scene unit is 1 meterpipeline.depthOfField.focalLength = 50; // focal length of the camera in millimeterspipeline.depthOfField.fStop = 1.4; // aka F number of the camera defined in stops as it would be on a physical deviceBloom
You can turn the bloom effect on and off with:
pipeline.bloomEnabled = true;The bloom luminance threshold, impact of the bloom, kernel size and scale can be controlled with the following:
pipeline.bloomThreshold = 0.8;pipeline.bloomWeight = 0.3;pipeline.bloomKernel = 64;pipeline.bloomScale = 0.5;Image processing effect
You can turn the image processing effect on and off with:
pipeline.imageProcessingEnabled = true;You can also control individual image processing subeffects. To get more info about the ImageProcessing postprocess, please read the following tutorial.
Chromatic Aberration
You can turn the effect on and off with:
pipeline.chromaticAberrationEnabled = true;Furthermore, you can control the distance of color channel separation with:
pipeline.chromaticAberration.aberrationAmount = 300;To modify the strength of the effect based on the distance from the center of the screen:
pipeline.chromaticAberration.radialIntensity = 3;To modify the direction of the aberration, set the direction as follows:
var rotation = Math.PI;pipeline.chromaticAberration.direction.x = Math.sin(rotation)pipeline.chromaticAberration.direction.y = Math.cos(rotation)Note: If both these values are set to 0 the direction will be towards the center of the screen.
Grain
You can turn the effect on and off with:
pipeline.grainEnabled = true;Furthermore, you can control the intensity of the grain with:
pipeline.grain.intensity = 10;To animate the grain on every frame, set:
pipeline.grain.animated = value;Example
You may be interested in this code example using default values, ready to be copy-pasted into your application:
import { ColorCurves } from "@babylonjs/core/Materials/colorCurves";import { ColorGradingTexture } from "@babylonjs/core/Materials/Textures/colorGradingTexture";import { DefaultRenderingPipeline } from "@babylonjs/core/PostProcesses/RenderPipeline/Pipelines/defaultRenderingPipeline";// https://doc.babylonjs.com/api/classes/babylon.defaultrenderingpipelinevar defaultPipeline = new DefaultRenderingPipeline("DefaultRenderingPipeline", true, // is HDR?scene, scene.cameras);if (defaultPipeline.isSupported) { /* MSAA */ defaultPipeline.samples = 1; // 1 by default /* imageProcessing */ defaultPipeline.imageProcessingEnabled = true; //true by default if (defaultPipeline.imageProcessingEnabled) { defaultPipeline.imageProcessing.contrast = 1; // 1 by default defaultPipeline.imageProcessing.exposure = 1; // 1 by default /* color grading */ defaultPipeline.imageProcessing.colorGradingEnabled = false; // false by default if (defaultPipeline.imageProcessing.colorGradingEnabled) { // using .3dl (best) : defaultPipeline.imageProcessing.colorGradingTexture = new ColorGradingTexture("textures/LateSunset.3dl", scene); // using .png : /* var colorGradingTexture = new BABYLON.Texture("textures/colorGrade-highContrast.png", scene, true, false); colorGradingTexture.wrapU = BABYLON.Texture.CLAMP_ADDRESSMODE; colorGradingTexture.wrapV = BABYLON.Texture.CLAMP_ADDRESSMODE; defaultPipeline.imageProcessing.colorGradingTexture = colorGradingTexture; defaultPipeline.imageProcessing.colorGradingWithGreenDepth = false; */ } /* color curves */ defaultPipeline.imageProcessing.colorCurvesEnabled = false; // false by default if (defaultPipeline.imageProcessing.colorCurvesEnabled) { var curve = new ColorCurves(); curve.globalDensity = 0; // 0 by default curve.globalExposure = 0; // 0 by default curve.globalHue = 30; // 30 by default curve.globalSaturation = 0; // 0 by default curve.highlightsDensity = 0; // 0 by default curve.highlightsExposure = 0; // 0 by default curve.highlightsHue = 30; // 30 by default curve.highlightsSaturation = 0; // 0 by default curve.midtonesDensity = 0; // 0 by default curve.midtonesExposure = 0; // 0 by default curve.midtonesHue = 30; // 30 by default curve.midtonesSaturation = 0; // 0 by default curve.shadowsDensity = 0; // 0 by default curve.shadowsExposure = 0; // 0 by default curve.shadowsHue = 30; // 30 by default curve.shadowsDensity = 80; curve.shadowsSaturation = 0; // 0 by default; defaultPipeline.imageProcessing.colorCurves = curve; } } /* bloom */ defaultPipeline.bloomEnabled = false; // false by default if (defaultPipeline.bloomEnabled) { defaultPipeline.bloomKernel = 64; // 64 by default defaultPipeline.bloomScale = 0.5; // 0.5 by default defaultPipeline.bloomThreshold = 0.9; // 0.9 by default defaultPipeline.bloomWeight = 0.15; // 0.15 by default } /* chromatic abberation */ defaultPipeline.chromaticAberrationEnabled = false; // false by default if (defaultPipeline.chromaticAberrationEnabled) { defaultPipeline.chromaticAberration.aberrationAmount = 30; // 30 by default defaultPipeline.chromaticAberration.adaptScaleToCurrentViewport = false; // false by default defaultPipeline.chromaticAberration.alphaMode = 0; // 0 by default defaultPipeline.chromaticAberration.alwaysForcePOT = false; // false by default defaultPipeline.chromaticAberration.enablePixelPerfectMode = false; // false by default defaultPipeline.chromaticAberration.forceFullscreenViewport = true; // true by default } /* DOF */ defaultPipeline.depthOfFieldEnabled = false; // false by default if (defaultPipeline.depthOfFieldEnabled && defaultPipeline.depthOfField.isSupported) { defaultPipeline.depthOfFieldBlurLevel = 0; // 0 by default defaultPipeline.depthOfField.fStop = 1.4; // 1.4 by default defaultPipeline.depthOfField.focalLength = 50; // 50 by default, mm defaultPipeline.depthOfField.focusDistance = 2000; // 2000 by default, mm defaultPipeline.depthOfField.lensSize = 50; // 50 by default } /* FXAA */ defaultPipeline.fxaaEnabled = false; // false by default if (defaultPipeline.fxaaEnabled) { defaultPipeline.fxaa.samples = 1; // 1 by default defaultPipeline.fxaa.adaptScaleToCurrentViewport = false; // false by default } /* glowLayer */ defaultPipeline.glowLayerEnabled = false; if (defaultPipeline.glowLayerEnabled) { defaultPipeline.glowLayer.blurKernelSize = 16; // 16 by default defaultPipeline.glowLayer.intensity = 1; // 1 by default } /* grain */ defaultPipeline.grainEnabled = false; if (defaultPipeline.grainEnabled) { defaultPipeline.grain.adaptScaleToCurrentViewport = false; // false by default defaultPipeline.grain.animated = false; // false by default defaultPipeline.grain.intensity = 30; // 30 by default } /* sharpen */ defaultPipeline.sharpenEnabled = false; if (defaultPipeline.sharpenEnabled) { defaultPipeline.sharpen.adaptScaleToCurrentViewport = false; // false by default defaultPipeline.sharpen.edgeAmount = 0.3; // 0.3 by default defaultPipeline.sharpen.colorAmount = 1; // 1 by default }}As usual, a playground is available to check out: Default Rendering Pipeline Template Code
