Dynamic Terrain
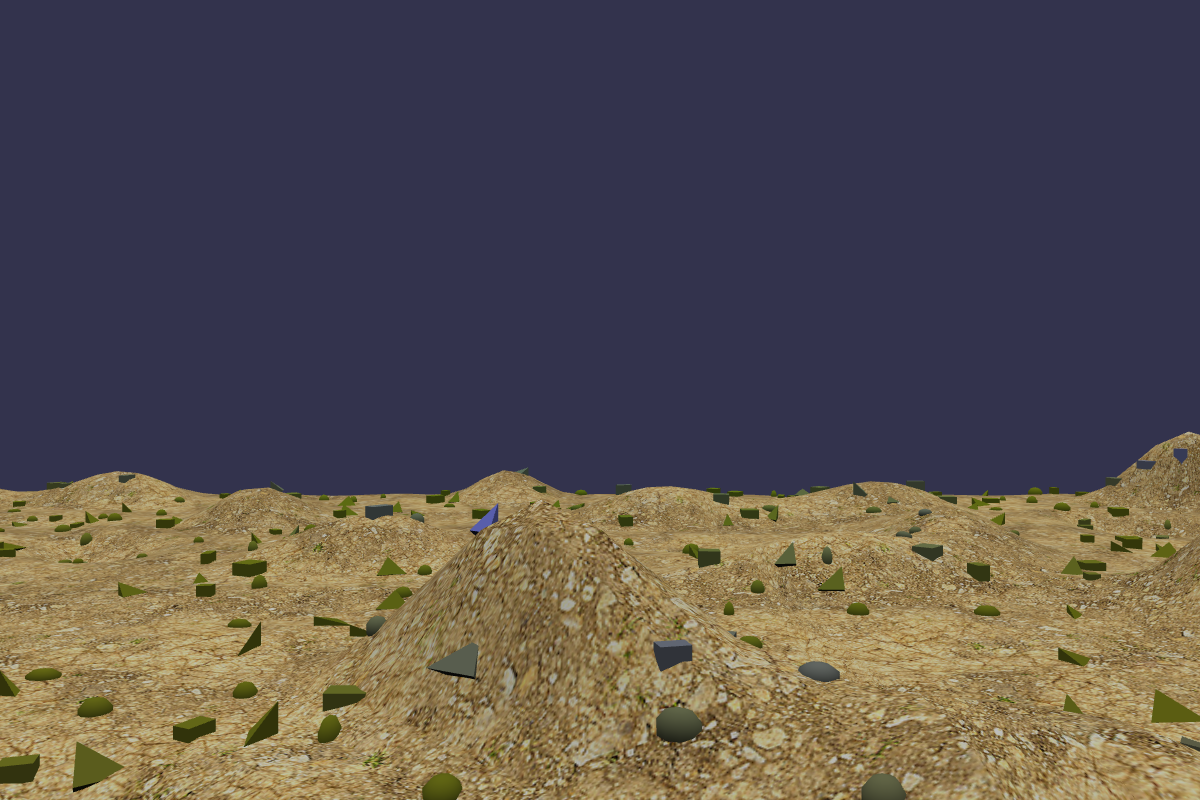
The Dynamic Terrain is an extension that provides a way to display a large terrain dynamically morphed from a map of 3D data.
The dynamic terrain is a standard BJS mesh, specifically a ribbon. It's linked to a camera and moves with it along the World X and Z axes. It is passed a set of 3D coordinates (x, y, z) in the World. This set of data is called the map. According to the camera's current position in the World, the dynamic terrain morphs to depict the map at that location.
Installation
Just download the JavaScript file dynamicTerrain.js (or, preferably, the minified version dynamicTerrain.min.js) from the Babylon.js extension repository folder DynamicTerrain/dist: https://github.com/BabylonJS/Extensions/tree/master/DynamicTerrain/dist
Then, in your code, include this script in an HTML tag after the script tag that declares Babylon.js:
<script src="babylon.js"></script><script src="dynamicTerrain.min.js"></script>It has also been converted to an ES6 compatible TypeScript module.
How To Use It
The dynamic terrain is a mesh that morphs on a logical data map. This map is a simple flat array of successive 3D coordinates (x, y, z) as floats. It can be as large as you need, as long as you have enough memory (you set how much of the map is rendered at a time).
The map must be passed to the dynamic terrain constructor as well as the number of subdivisions on the map width and depth.
const mapCoords = [some_big_flat_array_of_coordinates];const mapWidthPointNb = 2000; // 2000 points in the map widthconst mapDepthPointNb = 1000; // 1000 points in the map depthconst terrainSub = 100; // the terrain wil be 100x100 vertices onlyconst mapParams = {  mapData: mapCoords,  mapSubX: mapWidthPointNb,  mapSubZ: mapDepthPointNb,  terrainSub: terrainSub,};
const terrain = new BABYLON.DynamicTerrain("terrain", mapParams, scene);const terrainMesh = terrain.mesh;terrainMesh.diffuseTexture = myNiceTexture;
Some documented examples are here: https://github.com/BabylonJS/Extensions/tree/master/DynamicTerrain/documentation/dynamicTerrainExamples.md.
Getting Started
The Data Map
The first thing we need to create a dynamic terrain is a data map.
The data map is a simple flat array of successive 3D coordinates (x, y, z) in the World. It's defined by the number of points on the map width, called mapSubX by the dynamic terrain, and the number of points on the map depth, called mapSubZ.
The dynamic terrain imposes some constraints on the map:
- the distances between two successive points on the map width must be constant
- the distances between two successive points on the map depth must be constant
- the points must be sorted in ascending order regarding their coordinates, first on the width, then on the depth.
What does this mean?
If we call P[i, j] the point P at the row j on the map depth and at the column i on the map width, this means that:
- for any row
jin the map,P[0, j].xis less thanP[1, j].x, which is less thanP[2, j].x, etc. - for any column
iin the map,P[i, 0].zis less thanP[i, 1].z, which is less thanP[i, 2].z, etc. - the distance between each column is constant
- the distance between each row is constant, although not necessarily the same as the distance between each column.
Example:
Here, we populate a big Float32Array with successive 3D float coordinates. We use a simplex function from a third party library (perlin.js) to set each point's elevation (the height of the terrain at that point). This array is the data map. It's defined by 1000 points on its width and 800 points on its depth. The distance between the points is constant in the width and is different from the constant distance between the points in the depth.
const mapSubX = 1000; // map number of points on the widthconst mapSubZ = 800; // map number of points on the depthconst seed = 0.3; // set the noise seed for the Y value (elevation)noise.seed(seed); // generate the simplex noise, don't care about thisconst mapData = new Float32Array(mapSubX * mapSubZ * 3); // x3 because 3 values per point: x, y, zfor (let l = 0; l < mapSubZ; l++) {  // loop on depth points  for (let w = 0; w < mapSubX; w++) {    // loop on width points    const x = (w - mapSubX * 0.5) * 5.0; // distance inter-points = 5 on the width    const z = (l - mapSubZ * 0.5) * 2.0; // distance inter-points = 2 on the depth    const y = noise.simplex2(x, z); // elevation
    mapData[3 * (l * mapSubX + w)] = x;    mapData[3 * (l * mapSubX + w) + 1] = y;    mapData[3 * (l * mapSubX + w) + 2] = z;  }}
PG: Dynamic Map
PG: Wireframe Map
In order to better understand how this map is generated, we used a ribbon geometry mesh in the above playgrounds. The ribbon is thus a really big mesh (1000 x 800 = 800K vertices!). You shouldn't try to render such large meshes in your scene if you want to maintain a decent framerate. Remember that the logical map can be larger than 800K points without it all being rendered.
The Dynamic Terrain
Once we've got the data map, we can create the dynamic terrain.
const terrainSub = 100; // 100 terrain subdivisionsconst params = { mapData: mapData, // data map declaration: what data to use? mapSubX: mapSubX, // how are these data stored by rows and columns mapSubZ: mapSubZ, terrainSub: terrainSub, // how many terrain subdivisions wanted};const terrain = new BABYLON.DynamicTerrain("t", params, scene);In the above playground, the dynamic terrain is the green mesh moving over the data map. Notice that the green terrain is linked to the scene's active camera at its center and moves with it when we zoom in or out. The terrain adjusts itself automatically to the next exact points of the map as the camera moves over it.
The terrain is defined by its number of subdivisions, which is the same on both the X and Z axes. It's best to choose a multiple of 2 as the number of terrain subdivisions. Once created, this number never changes, nor the number of vertices of the terrain. Only its shape is dynamic. This means the computation cost to update the terrain is always constant and depends only on this subdivision value.
The terrain is a logical object providing several features. It embeds a BJS mesh accessible with the property .mesh:
const terrainMesh: terrain.mesh;terrain.Mesh.diffuseTexture = myTerrainTexture;Although passed at construction time, the data map, .mapSubX, and .mapSubZ can be changed at any time.
terrain.mapData = map2;terrain.mapSubX = mapSubX2;terrain.mapSubZ = mapSubZ2;This is useful if we have to dynamically download new chunks of data as the camera moves in the World.
Example:
// change the terrain map on the flyif (camera.position.z > someLimit) { terrain.mapData = map2;}If the map data isn't updated or if a new data array isn't passed to the terrain when it reaches the map edges, then the terrain goes on moving as if the current map were repeated on the current axis.
This means that, from the perspective of the terrain, the data map is infinitely repeated or tiled in every direction on the ground (unless we give it a specific behavior regarding the map bounds).
In short, by default, the terrain sees the map as infinite.
The Dynamic Terrain in Detail
LODs
Initial LOD
LOD is an acronym for Level Of Detail. It's a feature that reduces the rendering precision of a mesh when it is far away from the camera in order to lower the required computation: the fewer the vertices, the less CPU/GPU power needed.
The dynamic terrain also provides an LOD feature, but in a different way: the terrain's number of vertices is always kept constant, and only the part of the data map covered by the terrain changes.
By default, one terrain quad fits one map quad. This factor can be modified with the property .initialLOD (equal to 1, by default) at any time.
Examples:
The default initial LOD is 1, so 1 terrain quad is 1 map quad.
The initial LOD is set to 10, so 1 terrain quad is now 10x10 map quads (10 on each axis).
As a result, the terrain mesh is much larger while far less detailed with respect to the map data, but it keeps the same number of vertices (100 x 100). Setting an initial LOD to 10 is probably not realistic; it is only for explanation purposes.
In brief, the initial LOD value is the number of map quads on each axis, X and Z, per terrain quad.
Camera LOD
Back to the terrain with the default initial LOD value.
We can notice that when the camera is at a high altitude, the green terrain seems far away and quite small on the screen, which is expected behavior: distant things appear smaller.
However, we don't expect the ground to get smaller when moving to a higher altitude. Rather, it becomes less detailed to our eyes, and we can see a larger area of the ground at the same time.
The dynamic terrain provides a way to do this by increasing the LOD factor with the camera altitude (or with any other behavior we may want, such as changing the LOD with the camera speed instead).
We just have to overwrite the method updateCameraLOD(camera) and make it return an integer that will be added to the current LOD value.
// Terrain camera LOD: custom functionterrain.updateCameraLOD = function (terrainCamera) { // LOD value increases with camera altitude const camLOD = Math.abs((terrainCamera.globalPosition.y / 16.0) | 0); return camLOD;};In this example, the LOD value is incremented by 1 each time the altitude is +16 higher. If we get the camera higher by zooming out when looking at the ground, we can see that the terrain size increases since there are fewer details.
This function is passed the camera object linked to the terrain and must return a positive integer or zero. By default, zero is returned.
This function is called on each terrain update. Nevertheless, we can set this value at any time with the property .cameraLODCorrection.
Example:
terrain.cameraLODCorrection = 3; // adds +3 to the initial LODIn this example, the camera LOD correction value of 3 forces the global LOD factor to be 4, that is, 3 (camera) + 1 (initial value). This means each terrain quad is now 16 (4 x 4) map quads. In general, we don't need to set this value manually. It is better to update it automatically with the method updateCameraLod(camera), so the property is read rather than set.
This feature is useful only when the expected camera movements can place the terrain very far away and make it too small in the field of view. It's not really necessary to use it if the terrain stays about the same size in the field of view. Example: a character walking on the terrain ground.
Global LOD
The global LOD factor is the current sum of the initial value and the current camera LOD correction value. As said before, it's the current factor of the number of map quad per axis in each terrain quad.
It's readable with the property .LODValue.
const lod = terrain.LODValue;It's a positive integer (>= 1). Remember that the bigger the LOD value, the lower the terrain details.
Perimetric LOD
The perimetric LOD is the LOD in the distance around the terrain perimeter. When our camera is close enough to the ground and looking at distant things in the landscape, we expect that these things don't require too many vertices to be rendered, because they are far from us and don't need to be as detailed as near objects.
Let's step away from map rendering and create a smaller terrain with only 20 subdivisions:
The camera is located at a high altitude in order to understand better how to set the perimetric LOD.
The property to change the perimetric LOD is .LODLimits. It's an array of integers (or an empty array, by default).
Let's set a first limit to 4:
terrain.LODLimits = [4];How does the terrain look now after a forced update (note: the terrain automatically updates with camera movement on X or Z, so we force it here in case the camera does not move at all)?
We can notice that the center of the terrain has kept the original subdivision size, but all the quads located in the first 4 subdivisions from the terrain edges are now larger. In fact, their LOD factor is increased by 1 either on the X axis, on the Z axis, or on both axes, depending on their location on the global terrain grid.
When it is increased by 1 on both axes (in the grid corners), the LOD value is 2. This means one of these terrain quads fits exactly 2 x 2 map quads, while the central terrain quads still fit only 1 map quad each.
When we move the camera closer to the ground and orient it toward some distant hills, we can see that the distant quads are larger, so they depict a larger area of the map (and are therefore less detailed) than the nearby ones.
Let's add now another limit:
terrain.LODLimits = [2, 4];Same principle but with an extra step:
- The quads in the first 4 subdivisions have all their LOD increased by 1.
- The quads in the first 2 subdivisions have their LOD increased again by 1 from their current value, so increased by 2 relatively to the central ones.
We can set as many limits as we want:
terrain.LODLimits = [1, 2, 4];We can even repeat a limit as many times as we want. In this case, the LOD is incremented as many times as this limit is repeated:
terrain.LODLimits = [1, 1, 1, 1, 2, 4];Notes:
- We can change the value of the property
.LODLimitsat any time; it is taken into account on the next terrain update. So it is not a fixed value. We could imagine having different LOD behavior depending on the camera position, speed, or the landscape itself. - The array is always stored internally being sorted in the descending order (ex
[4, 2]). So let's remember this when we have to read this property value. - Some of the terrain quads aren't square, but rectangular. In fact, each terrain vertex is given current
lodXandlodZvalues that we can read from a custom user function if needed (as shown later).
A simple way to remember how this works:
terrain.LODLimits = [4, 2, 1, 1];// increment the LOD factor under the 4-th,// then once again under the second,// then twice again under the first rows and columnsExample with a bigger terrain: let's rotate slowly the camera or let's zoom in/out to see the perimetric LOD in action
Of course, the perimetric LOD and the camera LOD correction can work together
LOD Summary
- the initial LOD is the factor of the central terrain quad to apply to the map quad (default 1),
- the cameraLODcorrection is the quantity to add to this initial LOD to adjust to the camera position or distance (default 0),
- the LOD limits are the limits in the perimetric terrain subdivisions from where to increase the initial LOD (default
[]), the camera LOD correction applies the same way on all the quads, so even on the already increased perimetric quads. - these three properties can be set at any time! It's called dynamic terrain, isn't it?
- the global LOD value is the current LOD factor value of the central quads.
Terrain Update
According to the camera movement
The terrain is updated each time the camera crosses a terrain quad either on the X axis or on the Z axis.
However, we can set a higher tolerance on each axis so the terrain updates only after the camera crosses more terrain quads, using the properties .subToleranceX and .subToleranceZ.
terrain.subToleranceX = 10; // the terrain will be updated only after 10 quads crossed over by the camera on Xterrain.subToleranceZ = 5; // the terrain will be updated only after 5 quads crossed over by the camera on ZIn this example, the terrain is updated each time the camera flies over 10 quads on the X axis or 5 quads on the Z axis.
As a consequence, the terrain is moved by bunches of 10 or 5 quads each time it's updated.
The computation charge is constant on each terrain update and depends only on the terrain vertex number.
The tolerance can make the computation occur less often.
This may be useful when the camera moves rarely or by a small amount in the terrain area (a character walking on the ground, for instance), or simply if we need more CPU time for tasks other than updating the terrain.
The default values of both these properties are 1 (the minimum allowed value).
They can be changed at any time according to our needs.
User Custom Function
The Dynamic Terrain provides the ability to update each of its vertices during a terrain update.
Let's enable it (disabled by default). It can be enabled/disabled at any time.
terrain.useCustomVertexFunction = true;This function will be called on the next terrain updates, not necessarily on every frame.
// passed parameters:// - the current vertex// - the i-th and j-th indexes (column, row)terrain.updateVertex = function (vertex, i, j) { // reset the vertex color in case it was formerly modified vertex.color.g = 1.0; vertex.color.r = 1.0; vertex.color.b = 1.0; // change it above a given elevation if (vertex.position.y > 2.0) { vertex.color.b = vertex.position.y / 30.0; vertex.color.r = vertex.color.b; }};In the following examples, slowly rotate the camera or zoom in/out to see the effect. PG: Dynamic Terrain
The accessible vertex properties are:
- position: Vector3, local position in the terrain mesh system (updatable)
- color: Vector4 (updatable), default (1.0, 1.0, 1.0, 1.0)
- uvs: Vector2 (updatable)
- worldPosition: Vector3, global position in the World
- lodX: integer, the current LOD on X axis for this vertex
- lodZ: integer, the current LOD on Z axis for this vertex
- mapIndex: integer, the current index in the map array
Another colored example according to the position on the map
Of course, it also works with alpha.
This feature is disabled by default because it may have an impact on the CPU. When a terrain is 100x100 quads, it has 10K vertices, and this custom function is then called 10K times. So let's remember to make it as fast as possible and not allocate any objects within it, or the garbage collector will have to work and consume precious FPS. Also remember that this custom user function is called only on terrain updates, not necessarily on every frame. There is a way to force the terrain update on every frame, which we will see later.
After or Before Terrain Update
The Dynamic Terrain is updated automatically according to the camera position and all the LOD or tolerance parameters we've set so far. Sometimes it is necessary to do something just before or just after the terrain update, although we can't predict in the main logic when this update is triggered. Therefore, the Dynamic Terrain provides two functions that we can overwrite and that are called just before and just after the terrain update: beforeUpdate() and afterUpdate().
// compute the squared maximum distance in the terrainconst maxD2 = 0.0;terrain.beforeUpdate = function () {  maxD2 = terrain.terrainHalfSizeX * terrain.terrainHalfSizeZ;};
terrain.afterUpdate = function () {  maxD2 = 0.0;};
This may be useful for computing some variable values once before they are used by the custom user function updateVertex(), instead of computing them inside it.
Force Update On Every Frame
Unless there's a specific need, we shouldn't do this.
terrain.refreshEveryFrame = true; // false, by defaultThis can be changed at any time at will.
Useful Functions
If we need to know whether a set of 2D map coordinates (x, z) is currently inside the terrain, we can use the method contains(x, z), which returns a boolean.
if (terrain.contains(x, z)) { // do stuff}If we need to know the elevation of the map at the coordinates (x, z) in the World, even if this point is not one of the points defined in the map (that is, not one of the points in the map array), we can use the method getHeightFromMap(x, z).
const y = terrain.getHeightFromMap(x, z); // returns y at (x, z) in the WorldThis method can also return the value of the terrain normal vector at the coordinates (x, z). This value is set to a Vector3 passed as a reference: getHeightFromMap(x, z, ref).
import { Vector3 } from "@babylonjs/core/Maths/math.vector";const normal = Vector3.Zero();y = terrain.getHeightFromMap(x, z, normal); // update also normal with the terrain normal at (x, z)Other Properties
const mesh = terrain.mesh; // the terrain underlying BJS mesh
terrain.isAlwaysVisible = true; // default false: if the terrain is always visible in the camera field of view, this will speed up the terrain mesh selection process, so the global scene speed.
const quadSizeX = terrain.averageSubSizeX; // terrain real quad X sizeconst quadSizeZ = terrain.averageSubSizeZ; // terrain real quad Z size
const terrainSizeX = terrain.terrainSizeX; // terrain current X sizeconst terrainSizeZ = terrain.terrainSizeZ; // terrain current X size
const terrainHalfSizeX = terrain.terrainHalfSizeX; // terrain current X half sizeconst terrainHalfSizeZ = terrain.terrainHalfSizeZ; // terrain current Z half size
const terrainCenter = terrain.centerLocal; // Vector3 position of the terrain center in its local spaceconst terrainWorldCenter = terrain.centerWorld; // Vector3 position of the terrain center in the World space
const mapPointsX = terrain.mapSubX; // the passed map number of points on width at terrain construction timeconst mapPointsZ = terrain.mapSubZ; // the passed map number of points on depth at terrain construction time
const camera = terrain.camera; // the camera the terrain is linked to. By default, the scene active camera
Advanced Terrain
Color map
A color map can be passed to the terrain at construction time. This color map is a flat array of successive floats between 0 and 1 of each map point (r, g, b) values. This array must have the same size as the data array. Let's get back the very first example of the data array generation and let's populate a color array mapColors.
const mapSubX = 1000; // map number of points on the widthconst mapSubZ = 800; // map number of points on the depthconst seed = 0.3; // set the noise seednoise.seed(seed); // generate the simplex noise, don't care about thisconst mapData = new Float32Array(mapSubX * mapSubZ * 3); // x3 because 3 values per point: x, y, zconst mapColors = new Float32Array(mapSubX * mapSubZ * 3); // x3 because 3 values per point: r, g, bfor (const l = 0; l < mapSubZ; l++) {  // loop on depth points  for (const w = 0; w < mapSubX; w++) {    // loop on width points    const x = (w - mapSubX * 0.5) * 5.0; // distance inter-points = 5 on the width    const z = (l - mapSubZ * 0.5) * 2.0; // distance inter-points = 2 on the depth    const y = noise.simplex2(x, z); // elevation
    mapData[3 * (l * mapSubX + w)] = x;    mapData[3 * (l * mapSubX + w) + 1] = y;    mapData[3 * (l * mapSubX + w) + 2] = z;
    // colors of the map    mapColors[3 * (l * mapSubX + w)] = 0.5 + Math.random() * 0.2; // red    mapColors[3 * (l * mapSubX + w) + 1] = 0.5 + Math.random() * 0.4; // green    mapColors[3 * (l * mapSubX + w) + 2] = 0.5; // blue  }}
And let's pass this color array to the terrain at construction time with the optional parameter property .mapColors:
const terrainSub = 100; // 100 terrain subdivisionsconst params = { mapData: mapData, // data map declaration: what data to use? mapSubX: mapSubX, // how are these data stored by rows and columns mapSubZ: mapSubZ, mapColors: mapColors, // the array of map colors terrainSub: terrainSub, // how many terrain subdivisions wanted};const terrain = new BABYLON.DynamicTerrain("t", params, scene);Remember to try these examples out by slowly rotating the camera or zoom in or out.
Obviously this still works with the user custom function called with updateVertex():
UV map
If we assign a material and a texture to the terrain mesh, it's by default set to the current terrain size and shifted according to the camera movements.
PG: Dynamic Terrain
Before going further, let's note that the texturing works with both the color map and the user custom function
As with colors, we could have a set of UVs relative to the map as a flat array of successive floats between 0 and 1, representing the u and v values for each map point.
This array must be sized mapSubX x mapSubZ x 2 (because two floats per map point: u and v) and must be passed to the terrain at construction time with the optional parameter property .mapUVs
const terrainSub = 100; // 100 terrain subdivisionsconst params = { mapData: mapData, // data map declaration: what data to use? mapSubX: mapSubX, // how are these data stored by rows and columns mapSubZ: mapSubZ, mapUVs: mapUVs, // the array of map UVs terrainSub: terrainSub, // how many terrain subdivisions wanted};const terrain = new BABYLON.DynamicTerrain("t", params, scene);Example:
Here we populate a data map with no elevation (y = 0) and, at the same time, a UV map as a flat array by simply setting the u and v values in the 2D texture relative to the (x, z) coordinates of each map point.
const mapData = new Float32Array(mapSubX * mapSubZ * 3); // x3 float values per point: x, y and zconst mapUVs = new Float32Array(mapSubX * mapSubZ * 2); // x2 because 2 values per point: u, vfor (const l = 0; l < mapSubZ; l++) {  for (const w = 0; w < mapSubX; w++) {    const x = (w - mapSubX * 0.5) * 2.0;    const z = (l - mapSubZ * 0.5) * 2.0;
    mapData[3 * (l * mapSubX + w)] = x;    mapData[3 * (l * mapSubX + w) + 1] = 0.0;    mapData[3 * (l * mapSubX + w) + 2] = z;
    mapUVs[2 * (l * mapSubX + w)] = w / mapSubX; // u    mapUVs[2 * (l * mapSubX + w) + 1] = l / mapSubZ; // v  }}
Then we pass the populated array mapUVs to the Dynamic Terrain constructor with the optional parameter property mapUVs:
const params = { mapData: mapData, // data map declaration: what data to use? mapSubX: mapSubX, // how are these data stored by rows and columns mapSubZ: mapSubZ, mapUVs: mapUVs, // array of the map UVs terrainSub: terrainSub, // how many terrain subdivisions wanted};const terrain = new BABYLON.DynamicTerrain("t", params, scene);A FreeCamera was set instead of an ArcRotate one to move easily on the map. The map texture is also changed to the file earth.jpg.
As we can notice now, the texture is no longer bound to the terrain itself but to the map: the image is stretched in this example along the whole map.
In this previous example, we stretched the image across the whole map.
For this very specific need, we can also use the method .createUVMap(), which does the same thing (computation and assignment to the terrain) in a single call.
const params = { mapData: mapData, // data map declaration: what data to use? mapSubX: mapSubX, // how are these data stored by rows and columns mapSubZ: mapSubZ, terrainSub: terrainSub, // how many terrain subdivisions wanted // no more for mapUVs, it will be done by createUVMap()};const terrain = new BABYLON.DynamicTerrain("t", params, scene);terrain.createUVMap();// computes and sets an UV map stretching the texture on the whole imageExample with no more manual UV computation
Normal map
By default, when we assign a data map to the terrain at construction time, it precomputes all the normals of the map once.
Computing all the map normals is a heavy process, but it's done only once.
This lets us skip terrain mesh normal recomputation each time the terrain is morphed, that is, on each update. Thus, terrain normal recomputation is disabled by default.
This computation charge would be directly related to the terrain number of vertices (10K for a 100x100 terrain).
const terrainSub = 100; // 100 terrain subdivisionsconst params = { mapData: mapData, // data map declaration: what data to use? mapSubX: mapSubX, // how are these data stored by rows and columns mapSubZ: mapSubZ, terrainSub: terrainSub, // how many terrain subdivisions wanted // nothing more to do: the map normals are computed at creation time!};const terrain = new BABYLON.DynamicTerrain("t", params, scene);If for some reason (for example, dynamic morphing of the terrain, which is explained in the "Without data map" section), we need to force normal computation on each update:
terrain.computeNormals = true; // default false, to skip the normal computationAs the normals of the map are precomputed automatically for us, we don't need to care about them.
These normals are stored internally in a flat array of floats, just like the map coordinates.
There is still a way to use a custom normal array if needed.
This flat array of successive floats, used as normal vector coordinates (x, y, z) for each map point, can then be passed to the terrain. It simply must be exactly the same size as the map data array.
This array is passed with the optional parameter property .mapNormals.
const normalArray = [n1.x, n1.y, n1.z, n2.x, n2.y, n2.z, ...];const terrainSub = 100; // 100 terrain subdivisionsconst params = { mapData: mapData, // data map declaration: what data to use? mapSubX: mapSubX, // how are these data stored by rows and columns mapSubZ: mapSubZ, mapNormals: normalArray, // the array of map normals terrainSub: terrainSub // how many terrain subdivisions wanted}const terrain = new BABYLON.DynamicTerrain("t", params, scene);Example:
This terrain is 300x300, so it has 90K vertices, which is really a huge mesh to compute on every update.
Without (computeNormals = true),
Check the FPS difference when rotating the camera to feel the gain.
If we have several data sets that we intend to use as data maps, we can precompute all of these data sets' normals with the static method ComputeNormalsFromMapToRef(map, subX, subY, array).
const map1 = someFloat32Array;const map2 = someOtherFloat32Array;const map3 = someOtherFloat32Array;const normal1 = new Float32Array(map1.length);const normal2 = new Float32Array(map2.length);const normal3 = new Float32Array(map3.length);// let's precompute the normals of all the mapsBABYLON.DynamicTerrain.ComputeNormalsFromMapToRef(map1, subX1, subY1, normal1);BABYLON.DynamicTerrain.ComputeNormalsFromMapToRef(map2, subX2, subY2, normal2);BABYLON.DynamicTerrain.ComputeNormalsFromMapToRef(map3, subX3, subY3, normal3);Map Creation From a Height Map
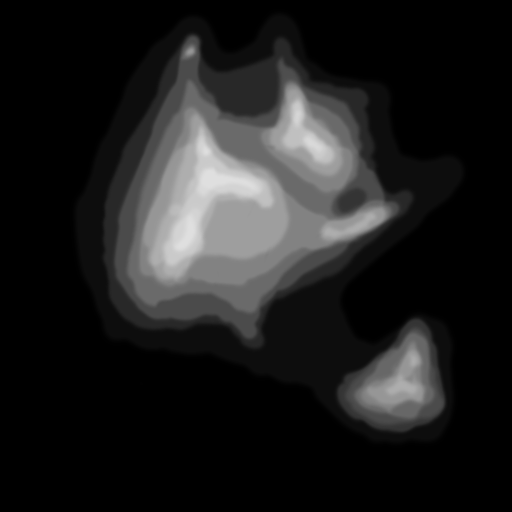
A height map is an image file, usually grayscale (from black to white), where each pixel color holds the point elevation: the brighter, the higher.
Example file: https://www.babylonjs.com/assets/heightMap.png
Like the BJS MeshBuilder class provides a method to create a mesh from a height map, the Dynamic Terrain provides a static method to generate a data map from a height map.
Here's the way to use it:
// Declare a callback function that will be executed once the heightmap file is downloaded// This function is passed the generated data and the number of points on the map depth and widthconst terrain;const createTerrain = function (mapData, mapSubX, mapSubZ) {  const options = {    terrainSub: 100, // 100 x 100 quads    mapData: mapData, // the generated data received    mapSubX: mapSubX,    mapSubZ: mapSubZ, // the map number of points per dimension  };  terrain = new BABYLON.DynamicTerrain("dt", options, scene);  terrain.createUVMap(); // compute also the UVs  terrain.mesh.material = someMaterial;  // etc about the terrain ...  // terrain.updateCameraLOD = function(camera) { ... }};
// Create the map from the height map and call the callback function when doneconst hmURL = "https://www.babylonjs.com/assets/heightMap.png"; // heightmap file URLconst hmOptions = { width: 5000, height: 4000, // map's z-axis depth (not elevation) in the World subX: 1000, subZ: 800, // number of points on map width and depth onReady: createTerrain, // callback function declaration};const mapData = new Float32Array(1000 * 800 * 3); // the array that will store the generated dataBABYLON.DynamicTerrain.CreateMapFromHeightMapToRef(hmURL, hmOptions, mapData, scene);hmURLis a string, it's the URL or the DataURL string of the height map image,widthandheightare optional floats (default 300), representing the dimensions of the map in the World,subXandsubZare optional integers (default 100), the number of points on each map dimension,minHeightandmaxHeightare the optional minimal and maximal elevations (floats, default 0 and 10),offsetXandoffsetZare optional floats (default 0) used to shift the map, which is centered around the World origin by default, along the X or Z World axes,onReadyis an optional callback function to be called when the data are generated. It's passed the data array and the number of points per map dimension,mapDatais a float array, sized subX x subZ x 3,sceneis the scene that will store the downloaded image in its internal database.
Let's note that, if we need to create the terrain in the callback function, we do not need to use this kind of function to precompute some data sets from different images in advance for later use:
const url1 = someURL;const url2 = someOtherURL;const url3 = someOtherURL;// all my maps will have the same subdivisions and dimensions// no callback function here. The "height" option is the Z-axis dimensionconst options = { width: 5000, height: 4000, subX: 1000, subZ: 800 };const set1 = new Float32Array(subX * subZ * 3);const set2 = new Float32Array(subX * subZ * 3);const set3 = new Float32Array(subX * subZ * 3);BABYLON.DynamicTerrain.CreateMapFromHeightMapToRef(url1, options, set1, scene);BABYLON.DynamicTerrain.CreateMapFromHeightMapToRef(url2, options, set2, scene);BABYLON.DynamicTerrain.CreateMapFromHeightMapToRef(url3, options, set3, scene);PG: Dynamic Terrain
In this example we use both the world image to texture the whole map with createUVMap() and the world height map to define the elevations.
Map Change on the Fly
The terrain can be assigned another map at any time.
Example:
// change the terrain map on the flyif (camera.position.z > someLimit) { terrain.mapData = map2;}This can be useful if new data are dynamically downloaded as the camera moves in the World.
Not only the map data can be changed, but also the color, uv or normal data.
// change the terrain map on the flyif (camera.position.z > someLimit) { terrain.mapData = map2; terrain.mapColors = colors2; terrain.mapUVs = uvs2; terrain.mapNormals = normals2;}Let's note that when we assign a new data map to a terrain, the normal map for that map is not automatically recomputed.
Thus we have two options:
- either we request this automatic normal recomputation, which can take some time, with the property
terrain.precomputeNormalsFromMap = true. In this case, every new data map assignment to the terrain triggers map normal computation on the fly,
terrain.precomputeNormalsFromMap = true; // default = falseterrain.mapData = map2; // the normal map is automatically computed on the hood- or, as explained in the previous section, we precompute the new data map normals ourselves beforehand and assign both the data map and the normal map to the terrain at once.
const map2 = someOtherFloat32Array;const normal2 = new Float32Array(map2.length);BABYLON.DynamicTerrain.ComputeNormalsFromMapToRef(map2, subX2, subY2, normal2);
// then, later in the code ...terrain.mapData = map2;terrain.mapNormals = normals2;
Without Data Map
The Dynamic Terrain is the right tool for rendering part of a map of 3D data.
We usually don't need to modify the map data because they are just what we want to render on the screen.
However, the Dynamic Terrain is ... dynamic.
This means that it can be used for purposes other than just rendering a 3D map.
For instance, it can be generated without any data map:
const terrainSub = 140; // terrain subdivisionsconst terrainOptions = { terrainSub: terrainSub };const terrain = new BABYLON.DynamicTerrain("dt", terrainOptions, scene);In fact, we could even omit terrainSub, and the terrain would still be generated with a size of 60x60.
A Dynamic Terrain generated without any data map initially looks like a simple planar ribbon.
Of course we can always add to it some LOD behavior (perimetric or camera LOD) like to any standard terrain created with a data map.
But it may be interesting to use in this case the user custom function and to modify the terrain vertex positions, something we wouldn't probably want to do with a data map generated terrain.
terrain.useCustomVertexFunction = true;
terrain.updateVertex = function (vertex, i, j) { vertex.position.y = 2.0 * Math.sin(i / 5.0) * Math.cos(j / 5.0);};Let's remember that, when enabled, the method updateVertex is called only on each terrain update (so when the camera moves), not necessarily every frame.
If we need to give the terrain an extra animation, we can set its property .refreshEveryFrame to true and add, for instance, a movement depending on the time:
const t = 0.0;terrain.useCustomVertexFunction = true;terrain.refreshEveryFrame = true;terrain.computeNormals = true;
// user custom function: now the elevation depends on t too.terrain.updateVertex = function (vertex, i, j) { vertex.position.y = 2.0 * Math.sin((vertex.position.x + t) / 5.0) * Math.cos((vertex.position.z + t) / 5.0);};// scene animationscene.registerBeforeRender(function () { t += 0.01;});The CPU load required by the method updateVertex() depends, of course, on what it does, but also on the terrain's number of vertices.
Let's note that, as we computationally change each terrain vertex's elevation, normal computation must be forced (terrain.computeNormals = true) to get correct light reflection with plain triangles:
Important note:
We used here the parameters i, j and the vertex position property.
iis the vertex index on the terrain X axis, it's an integer valued between 0 andterrainSub, both included.jis the vertex index on the terrain Z axis, it's an integer valued between 0 andterrainSub, both included.- the vertex coordinates
xandzare always positive, this means the terrain is NOT centered in its local space but starts from the system origin at i = 0 and j = 0: the first terrain vertex is at (0, 0) in the plane (xOz), the other vertices have then positive x and z coordinate values only.