Getting Started - Chapter 3 - Car Materials
Car Material
Just as we used different images on different faces of a box, something similar is available for extruded polygons and cylinders.
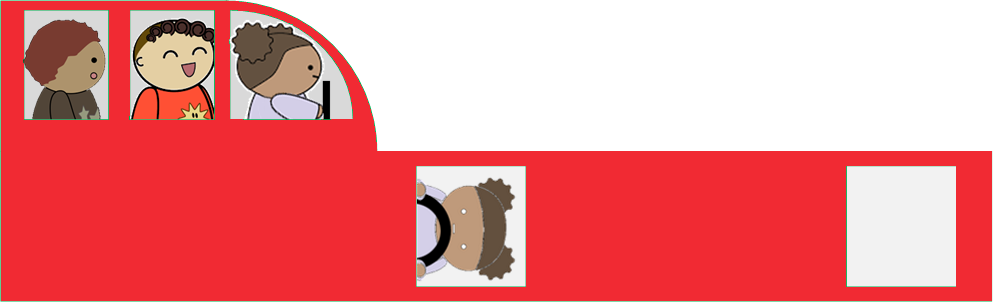
For the car body, we use this image.
and this one for the wheels
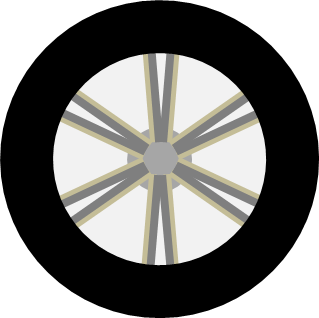
For the cylinder, face 0 is the bottom, face 2 is the top, and face 1 is the edge joining the bottom and top. For the extruded polygon, face 0 is the top and face 2 is the bottom. Remember that the car body and its wheels are currently built lying down.
The top and bottom of the car body use the image in the top-left (almost) quarter. The edge part, which goes across the bottom, around the front, across the top, and down the back of the body, uses the lower half of the image.
The top of the car body is as you would expect and is given by the bottom-left co-ordinates (0, 0.5) to the top-right co-ordinates (0.38, 1):
import { Vector4 } from "@babylonjs/core/Maths/math.vector";faceUV[0] = new Vector4(0, 0.5, 0.38, 1);The bottom of the car body uses the same image but it needs flipping over to fit the other side of the car.
import { Vector4 } from "@babylonjs/core/Maths/math.vector";faceUV[2] = new Vector4(0.38, 1, 0, 0.5);The edge runs from (0, 0) to (1, 0.5)
import { Vector4 } from "@babylonjs/core/Maths/math.vector";faceUV[1] = new Vector4(0, 0, 1, 0.5);A wheel is more straightforward because of its symmetry, and it uses the whole image for the top and bottom while just picking up a black pixel for the edges.
import { Vector4 } from "@babylonjs/core/Maths/math.vector";wheelUV[0] = new Vector4(0, 0, 1, 1);wheelUV[1] = new Vector4(0, 0.5, 0, 0.5);wheelUV[2] = new Vector4(0, 0, 1, 1);Putting these together and rotating the finished car upright gives:
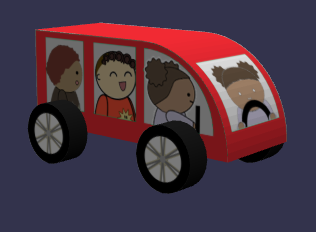
At last we are ready to think about animating the wheels.